Showing posts with label creativity. Show all posts

Tuesday, August 12, 2014

Ginger: Simple Syrup.

Simple syrup is sugar and water, in equal parts, heated until the sugar granules are melted. Simple. It is the ideal sweetener for cold foods, especially beverages.

White sugar is default in simple syrup, though you can use brown sugars, raw sugar, and any other sweetened granule you desire. Experiment.

In a previous posting I shared information on making ginger vodka through infusion and mentioned that the ginger can be reused for other purposes. A recent experiment of mine led to a delicious ginger simple syrup using the ginger from a vodka infusion a couple weeks ago.

I had about a cup and half of leftover vodka ginger slices and about 1 inch of fresh ginger root that I peeled, sliced and added to that. In a small sauce pan I combined the ginger, 1 ½ cups of water, and 1 ½ cups of white sugar. On high heat I brought it just to a boil then immediately reduced the heat to simmer for about 5-10 minutes.
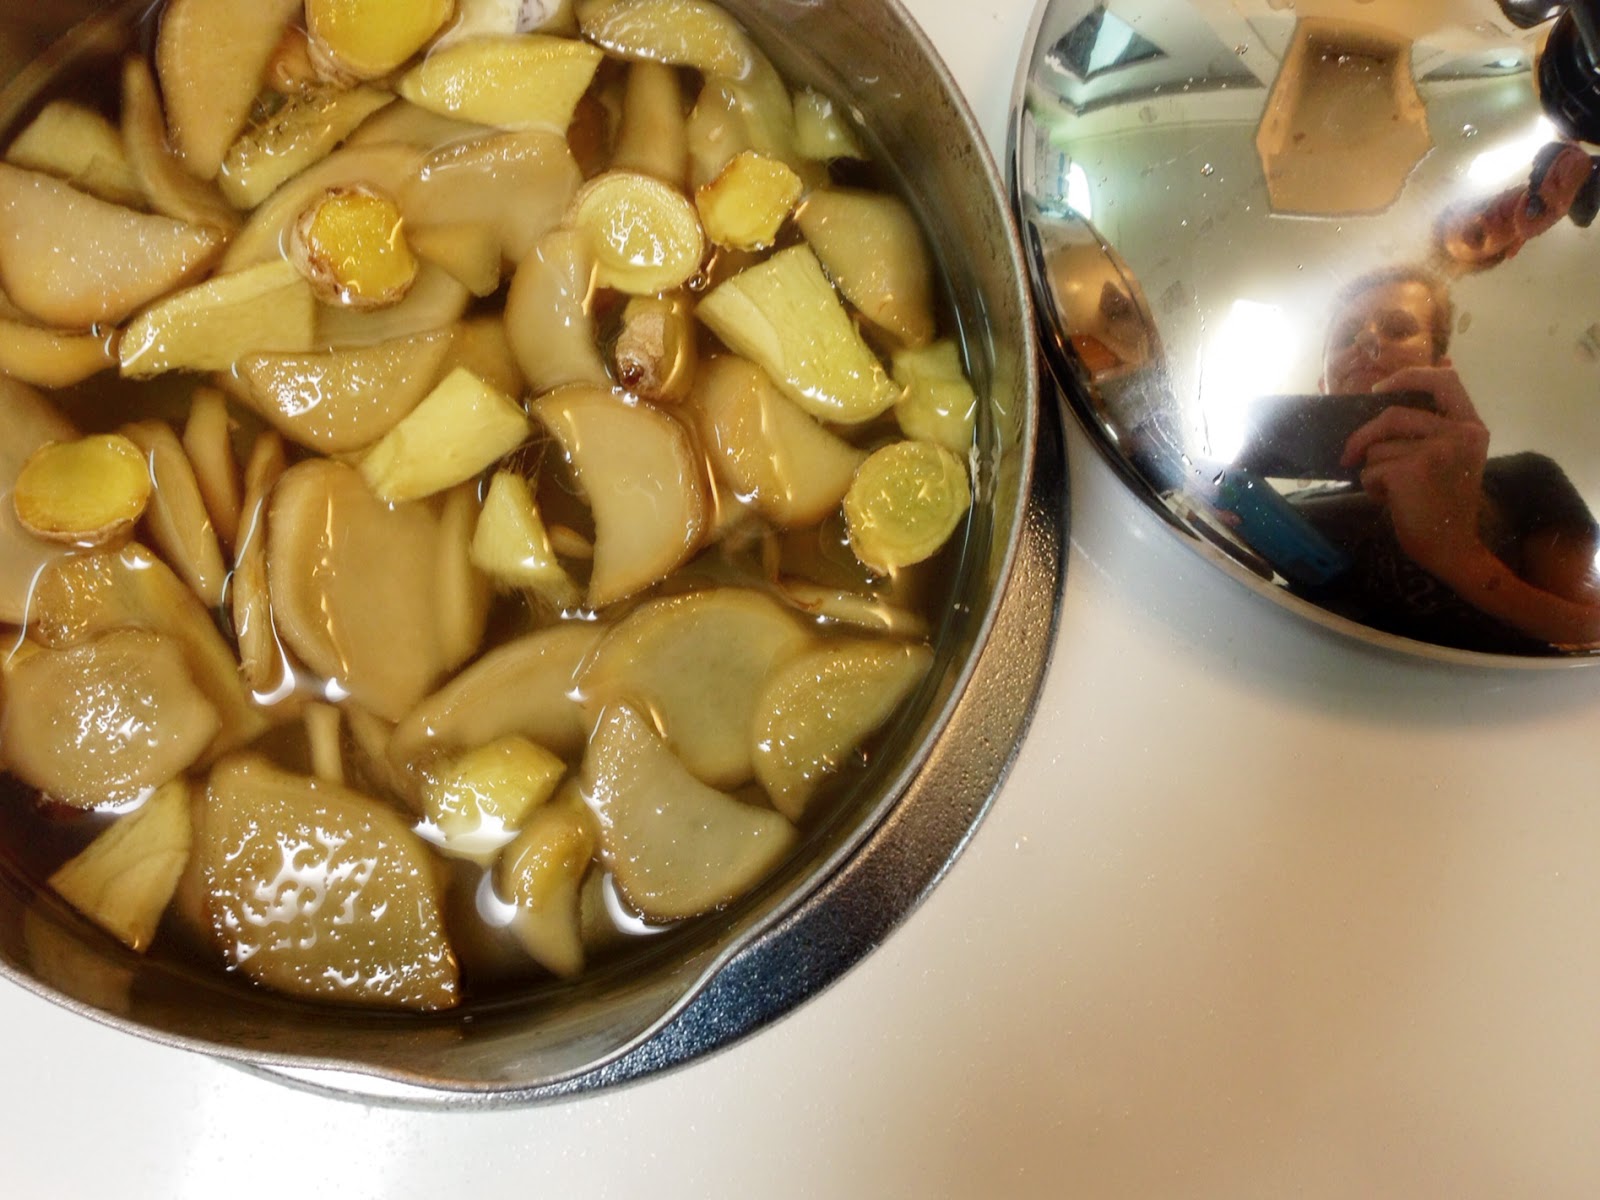


While giving it a gentle stir periodically I smelled and tasted until it reached my desired gingery-ness. I can't describe it exactly but you should know it when you taste it – a combination of “Yum!” and “Bam!”  Once you hit that point remove the pot from the heat and let it cool enough to where you can pour it through a strainer and funnel it into a bottle or jar. I prefer glass to keep the taste as pure as possible.


Ginger syrup in green sun tea - yum!


Simple syrup should be stored in the refrigerator and will keep as-is for a week, maybe two. However, an easy trick will preserve it for much longer: simply add a small splash of plain vodka to the mixture. I add about 2 teaspoons to a 10-14 ounce bottle. I just eye-ball it; add enough that it mixes thoroughly but not enough to make it alcoholic.  You don't need much and you cannot taste it unless you've added too much. Using this trick most of my simple syrups last almost indefinitely, or at least until they are gone.


Ginger: Gin-Gin Martini.

My earliest memories of ginger include the nose-tingling sensation of Vernor's Ginger Ale and my Mother's dinnertime warning to not eat any ginger slices hidden in the stir-fry.

My love of ginger grows each time I taste it used in a different way. If it's on a menu in any manner I will try it. Four or five years ago I went to a Seattle restaurant with a friend before attending the ballet and with a little hesitancy ordered their Gin-Gin Martini. It has been my favorite cocktail ever since.

I began making it at home using store-bought ginger vodka, first with a Polish rye version, Alchemia Imbirowa, and when I could not find that, Skyy Ginger Vodka. The Alchmia was decent but eventually it became unavailable; Skyy was better than nothing but certainly lacked a true ginger root essence, tasting more of ginger ale syrup than the real thing.

Dissatisfied with the ready-made options I decided to make the ginger vodka myself, not actually distilling it of course, but by simple infusion. It was insanely easy and I could not believe I wasn't making it all along.

Three simple steps to make ginger vodka:
1. Peel and slice a ginger root
2. Soak cut ginger in plain vodka
3. Strain

Three detailed steps to make ginger vodka (using a 1 liter bottle):

1. Find a piece of ginger root with maybe 6 or 7 inches of usable pieces; it is better to infuse too much than too little because you can always dilute it down to your preference. You don't have to remove the outer skin but it makes a more clear final product so I always do; use a peeler or a small knife (very carefully). Slice the root across the grain into discs about 1/8 to ¼ inches thick. This isn't science, you don't have to measure, but you want to take full advantage of all the glorious ginger flavor. Once cut you should have a hefty handful of sliced ginger, maybe 1 ½ to 2 cups.

2. Put the sliced ginger into a pitcher and pour the vodka in. Place the pitcher into a refrigerator for at least 2 days, I've left it in for up to a week. Soaking ginger in alcohol is actually one way of preserving it so I wouldn't worry about the time on the long end.

3. Using a mesh strainer and a funnel pour the infused vodka back into the original bottle. I store the finished product in the refrigerator, it just seems better. If you are infusing less than a bottle it is very convenient to use a coffee press because then you can skip the strainer and funnel and simply pour directly from the pitcher.

4. (Optional, but highly recommended) Save the ginger from your infusion and store it in the refrigerator, I use a glass bowl covered with plastic wrap. As I mentioned earlier, it is actually preserved and can be re-used. Most often I use it in strir-frys but it is certainly not limited to that.


Finally, you now have ginger vodka and can make your own Gin-Gin Martini. Yes, I know it is not technically a martini, but since it contains only spirits I let the term slide on this one.


Gin-Gin Martini

1 oz. Gin (Bombay Sapphire pref.)
1 oz. Ginger vodka (home-infused pref.)
1 slice of cucumber

In a cocktail shaker add ice and spirits. Shake or stir (pref.) until well-chilled, the colder the better. Strain into small cocktail glass. Place cucumber slice on the rim. Enjoy.

Wednesday, May 21, 2014

Happy Fun Time with Small Ikea Projects.


Even though our closest Ikea is only about 14 miles away it takes an hour to drive there if traffic is moving well.  Our first visit was on a Friday afternoon late last summer shortly after we moved here and it was packed.  When I decided return this past Wednesday I chose to go by myself and arrived just after their 10 am opening, carefully backing in to my parking space.

Previously we had parked front end first as we are used to in the US.  We were the only vehicle there parked like that.  Most drivers in Japan seem to back-in park.  I assume it is due to the population density and the number of people always walking and riding bikes.  It is safer to back in to a parking space where people are unlikely to be than to back out of that space where people are guaranteed to be.  Then when you leave, facing outward, you can easily see anyone moving.  I am grateful for our small car because backing in a right-side drive vehicle takes some a lot of practice after operating as a left-side driver for twenty years.

The number of shoppers this time seemed similar to what I am familiar with in the States so I was able to take my time following the path around the store.  I worked comfortably off my prepared list and found most of what I was looking for.  


Top priority on my list was the Bekvam step stool for our bathroom; I looked for it on our previous trip but it was sold out.  Various hygiene tasks are simpler to perform while sitting, such as clipping your nails.  The toilet lid is generally the default location to sit in a bathroom.  The plastic lid on our industrial/commercial commode, however, is too flexible and bends inward with any weight.  This leaves the bathtub edge to sit on which is not comfortable in the least.

Hence, the step stool.  Not only is it versatile enough for use an almost any room, at ¥1533 (~$15) it was one of the most inexpensive options.  


I chose the natural wood and stained the pieces outside a couple days ago with two coats of the Behandla glazing paint.  I put it together yesterday and am impressed with its solidity, not a creak or wobble at all, and it fits perfectly under the sink.

The shelves pictured here on the left are a future project.  I picked up the set for $5 but one of them must be cured of it's unfortunate white sponge paint.  I am considering whether to paint both or just the one, and what type of paint to use over the laminate surface.

The black Kassett magazine files are new also.  I have other pieces in the series and these were on my list.


Using the same Ikea glaze I stained these two small unfinished cigar boxes I picked up at our local thrift store for 75¢ each.  They had some cutesy decoration things glued on the tops that I gently, but easily, pried off.  Then I sanded off the glue residue.

You can also see here some of the Kassett series boxes bought previously that are no longer available.  I use them for storing medium sized photo prints and albums.


The remaining Ikea items I bought are photo frames.  I carefully measured the sizes I needed and researched the metric equivalent to find the appropriate sizes for my needs.  

We have a window at the top of our stairs with blank walls on either side demanding art.  Because the light is usually dim in this hallway I wanted some large but simple photographs to hang there.  I waited (and waited) until Mpix ran a sale and ordered 20 inch square prints of two macro photos I took this past spring.  The Nyttja frames are 50 cm square, about half an inch off, but since they are upstairs I can alter the framing just a bit and it won't be as noticeable.  We shall see how it works out when the prints arrive.

Monday, April 21, 2014

Creativity Takes Practice.

"Creativity isn't a mythical creature to be caught and tamed.  It's a habit...a way of life that's built over time."

Jane Porter writes thought-provoking ideas in her article, "How to Cultivate a Creative Thinking Habit," that both the inspiration-seekers and practiced imaginatives alike can benefit from.

http://www.fastcompany.com/3026816/dialed/how-to-cultivate-a-creative-thinking-habit

Tuesday, April 8, 2014

Thrifty Cleaning Tip: Savings on Spray.

Before I even share this nugget of creative frugality I feel the need to first justify my use of the product.

My use of disposable cleansing wipes started slowly because I find them expensive and environmentally unsound.  When my siblings began having children I began to understand the obvious hygienic diapering needs of parents and caregivers and loosened my rules to accept bathroom wipes.  Then I discovered that window cleaning wipes left far less lint and foggy residue than a spray with towels (whether cloth or paper) and began using those, especially on photo frame glass.  Now I live in a house with white tile floors and white, rubbery caulking sealing every imaginable edge that shows every little fuzz, hair, or who-knows-what that touches it.  Add to that a cat who throws up and leaves trails of little kitty paw prints through the house and you get a woman who uses cleaning wipes.

The selection of cleansing wipes is minuscule here, we can choose between Clorox and Lysol brands.  I choose the type of Clorox wipe that cleans up grease also, making it perfect for the entire house because, as I forgot to mention, our kitchen has ultra-white counter tops and all white appliances.  When we moved in I bought a two-pack to keep under the kitchen sink containing a total of 150 wet wipes.  I noticed a fair amount of liquid left in the bottom once the first container was empty so I dumped it into the second container; it seemed wrong to discard it.

A couple weeks ago that second tub of wipes was running low and there was a considerable amount of liquid left.  I tried pouring some on paper towels but it didn't seem to have adequate cleansing ability and I concluded that a spray bottle was my best solution.  Today I stopped by a decent ¥100 store and bought one then filled it up with excess liquid and now I have over 300 ml of perfectly good cleaning spray.

What a Thrifty Cleaning Tip!  Pour excess cleaning solution remaining in a disposable wet wipe container into a spray bottle to reuse.  For safety, please label the spray bottle with the contents, especially the chemical components.  Simply cut the paper label and tape it to the spray bottle.


Please, be safe and label and bottle.

Monday, December 30, 2013

Supply Drawer Dividers.

You may have just finished reading about my lovely Supply Drawer Reface project.  If yes, thank you and please continue reading to see where the story leads.  If you have not, may I suggest following this link to do so in order to catch up.


After refacing.


When filling up all my newly refaced drawers I took care to maintain a comfortable level of organization that would enhance function yet not force rigid guidelines on precisely where items must be put back.  Let’s face it, sometimes we just dump things in drawers.  Even you.

The two deep bottom drawers mainly store bulky and less used items like stationary, old label makers and extra boxes of safety pins, tape, and the like.  They stay fairly organized on their own and are comfortably sitting this round out.

The three shallow drawers on top are used constantly because they hold the writing instruments, scissors, tape, rulers, sticky notes, and etcetera.  Now that the supply drawers live in a shared space (i.e. not my own separate office) my husband uses it almost as often as I do and I must learn how to share it needs to function for both of us.  

Most used of all five drawers is the top one.  I wish I took a “before” photo but surely you can picture a 10x12 inch drawer filled with a mixture of pens, pencils, markers, and miscellaneous writing utensils.  The thing is, it’s always been that way; any attempted organization eventually failed, reverting it back to a single dumping drawer.  Though not ideal, it worked.  But when I began dumping them in this time, after fixing it up, I stopped and said, “No, there must be a better way.”

Those who know me are aware of my obsession making and using organizers out of old boxes.  (I’m actually in the middle of yet another said project).  Sometimes I fear this may lean towards the hoarding spectrum.  At any time you can visit and see a couple small groupings of small and medium-sized empty boxes, but at the same time you can also see where and how I've used them in practical manners.  Here is one of those stories…


Stay hydrated. 


I began with a large, clean work surface; the empty drawer, freshly cleaned and refurbished; and all the needed supplies for the project.  The boxes I used came with a popular Scotch and are made of a great cardboard that is quite sturdy for its relative thinness with a smooth, white interior.


Length.

Depth.

Using a ruler that is exactly 12 inches (30.48cm) end-to-end I measured the length of the drawer.  The ruler actually fit at exactly that length at the shortest part so if I made the drawer dividers 30cm long they would fit at any point across the drawer comfortably.  The drawer height is 8.5 cm so I decided on 7cm for the divider height so it would be deep enough to hold a lot but not tall enough to impede opening the drawer (obviously).

Please be very careful using your cutting instrument of choice.

The original box is 33.5cm x 9-9.5cm (the sides have small size discrepancies common for mass-produced consumer product boxes) so I needed to trim it down.  Using the side with the longest end as the bottom of the divider (in this case, the side with the lid flap) I measured 7cm up from there on both sides.  I cut the small lid flaps off because they are not needed and just get in the way.  Then using a very sharp box cutter I very carefully cut along the 7cm marked line all the way around.  The excess just cut off is not needed in this project, I put it into recycling.


Snipping the bottom edge to make the flaps.

Now the divider is taking shape.  I measured 30cm along the bottom, marking a line there indicating where I wanted the end of the divider.  I then cut along the corners up to that line creating small flaps and folded them to the inside.  Holding them there I mustered all the dexterity I could and pulled the box up on its end in order to fold the bottom (roughly shown in the photo).  I marked a new line on the end where the side flaps came up and cut that extra part off.  At this point I pulled out the tape and started holding and taping everything together until I had the finished organizers that fit perfectly in the drawer.


A confusing photo for a confusing step.


When I started sorting the markers and pens into their new dividers I didn't like how items looked or felt in the middle space.  I worried that smaller objects may slide under the boxes and decided to make another, smaller box, to put in the middle.  Of course.


Oh, she's at it again.

Often when my husband finishes a box of cereal he will thoughtfully leave the empty box at the bottom of the pantry, next to the paper recycling, in case I want to use it.  So when I opened the pantry door that afternoon an empty box awaited me.  Destiny, it was, when I tested the size of the box and it fit absolutely perfect in that empty space.  I was so excited; it took me only a couple minutes to measure, cut, and tape the box for the middle as well as a slightly smaller one to put inside.  I was giddy at this point and couldn't wait to begin filling them.

Markers, pencils and miscellaneous, and pens.

The resulting drawer organizers are exactly what I wanted.  If the outside designs on the boxes bother me I can easily trim them down more or cover them with white paper to unify the look.  I’ll wait and see.

Top drawer.

To satisfy your curiosity, the second drawer holds scissors, rulers, tapes, and few other things.  In the center is a clear divider cut from a large Q-Tip box.

Second drawer.

The third drawer utilizes some plastic dividers I found at a thrift store many years ago and contain various things that don’t categorize well.

Third drawer.

Sharing this project seems a bit personal, as if you are pilfering through my drawers and fingering my eclectic mixture of pens (which all work well, by the way).  At least you know who you can always borrow a pen from though.


Supply Drawer Reface.

Last October I completed setup of my office space which occupies half our formal dining room (that is never used for formal dining) as shown in that story.  Though I considered my office essentially done I knew a few minor projects remained; Isn't that always the case though?

“Shoved in the right corner (under the heating/cooling unit) are my old, busted up, plastic Rubbermaid storage drawers for my office supplies.”  They sat in that same condition until recently.  I pretty much knew how I wanted to fix them up but did not yet have a clear plan.  My first thought was Con-Tac paper, but the biggest name in self-adhesive paper also seemed to be the biggest priced and online prices didn't differ much from the local selection.  At that point the project moved to the back-burner until a better solution arose.


Before: Rough shape.

Before.


After: Wow, how did this happen?

After.


A couple weeks ago my husband and I went to a Japanese home store called Super Viva Home that carries almost everything you would use at home and then some.  While wandering around curtains and carpeting I noticed a section with self-adhesive paper and instinctively looked directly at a small stash of bits and pieces rolled up individually and priced very, very low.  I selected a small roll of white paper with a subtle wood grain-like texture for ¥39!  That’s about 39₵ if you remember that 1 yen is about 1 penny, give or take a fraction with currency fluctuation.  That tiny purchase instigated my supply drawer refurbishment.


First things always first: Clean!  I emptied the drawers and carefully wiped them completely out.  This included the laborious chore of using Goo-Gone to remove tape residue from packers who practically mummified the unit with packing tape.  After that I had to use isopropyl alcohol to remove that residue.   For certain cleaning tasks lately I've been using grease-cutting disinfectant wipes.  I know, I know, not the most environmentally sound but one wipe will outlast several paper towels and the cloth-like texture seems to clean surfaces better and dries quickly.  (I work very hard making conscious decisions regarding the environment but no one is 100% earth-friendly, we just try to do our part best we can.)  The grease cleaning capability of the wipes also helped prepare the plastic for the adhesive paper to stick thoroughly after the extensive Goo-Gone treatment.


With the hard part over the fun can commence: Time to “measure twice and cut once” as my handyman-skilled Grandpa Jack always said.  He passed that to my crafty Mom and she passed it to me.  Using a flexible measuring tape I followed the width of the curved drawer faƧade with a little overhang on each side, 31.5cm.  Why not 32cm?  I like the challenge.  Then I measured the height from the bottom up to the drawer pull indentation with a straight ruler, 5.5cm for the shallow drawers and 9.5cm for the deep drawers.  Before cutting the paper for each drawer I double checked the measurements.


Notice the tiny square design on the front, I'll use that later.


The adhesive paper is from a German company, d-c-fix, so the grid on the back used metric measurements making cutting (after re-checking my numbers) a breeze. 


I did not use the paper trimmer to cut, it would gum up the blade.  I set it on top to prevent the paper from rolling up.

Using my acute attention to detail I found a method to adhere the paper as centered as humanly possible.  I cut a small strip from the middle of the measured and cut piece and lined it up with a small, square design element on the front center of every drawer.  After lightly placing the sticky portion on the center I leveled the paper near the bottom of the drawer, leaving a small space to prevent accidental unpeeling over time.  When it looked straight and even I firmly pressed the middle to secure it.


Stuck on the middle square.


Taking a deep breath I entered the point of no return: the final peel-and-stick.  This is not a strength of mine, evidenced by the countless screen protectors I have ruined over the years by poor application attempts on multiple electronic devices.  The odds here leaned slightly in my favor though as the adhesive paper is flexible and doesn't easily slip from your fingers and slap down on the surface.  Using a small, stiff ruler (yes, I have many rulers) and beginning from the center cut I made previously I slowly peeled back the paper while using the ruler’s edge to lay it flat.  I repeated this process for each drawer and ne'er an air bubble in sight.


As I mentioned previously, this drawer unit is old, well used, and injured after a few long-distance moves.  Some of the drawers have damage, some repaired, some not.  I still had adhesive paper left so I measured and cut pieces to cover both sides of the damaged spots, hopefully adding some reinforcement as well.  Since these areas are on the sides I was not overly concerned about perfect aesthetics but simply made sure they were covered and protected adequately.


This fix is years old and still holding.

New damage.  I stuck paper on both sides, staying a bit from the edge to prevent peeling.


Finally the time came to re-fill the drawers.  This process was fairly simple because before we moved I carefully went through them, removing items unnecessary to bring with us and discarding those not worthy of storage.  This time, however, I realized that one drawer in particular needed organization so I left that one empty to begin my next endeavor, Supply Drawer Dividers.  Stay tuned.


Finished drawer.  Notice the slight over hang on the side an the tiny space left at the bottom.

Close up of wood-grain embossing.


Sunday, December 22, 2013

Gift Box Trick.

Genius.

Absolutely, creatively genius.

I have been volunteering at a fundraising gift wrap table recently and this incredible trick was shared by a customer to another volunteer who then passed it to me.  Since then I have shared it with every other volunteer and numerous customers because of its sheer simplicity and practicality.

This is how to get twice as many gift boxes out of your current supply and/or create new sizes from what you already have.

Step one: Get a box top or bottom.


Step two: Fold one end to up to the opposite flap edge.


Step three: Fold the other side to the opposite flap edge.


Step four: Using scissors cut the creases to the box edge.


Step five: It's ready to use.  Just open it up.  To close, tuck the small, square flaps that you cut to the inside of the box.  It's really easier done than said.


This trick works great with gift boxes that get partially crunched or scarred with a tape rip.  If you do not already reuse gift boxes then I really hope you at least recycle them.  If not, shame on you please reconsider.  It takes minimal effort to reduce your consumption, reuse what you already have, and recycle what you can.  Honestly, my main reason for using these guidelines is financial because economically it just makes sense.  It just so happens that these practices are also smart for the environment.  Win-win.


(These photos were taken with an iPhone and are by no means intended to be "real" photos, just snapshots of where I was and what I saw.)


Tuesday, December 10, 2013

Not So "Mega" Anymore.

Our household is loyal to Charmin Ultra Strong bathroom tissue, or as I refer to it, "Charmin-in-the-red".  When ever I try to save a little money and buy something else I regret it.  Once I even left a horrible 12 pack, less one roll, by the trash bins at our apartment complex.

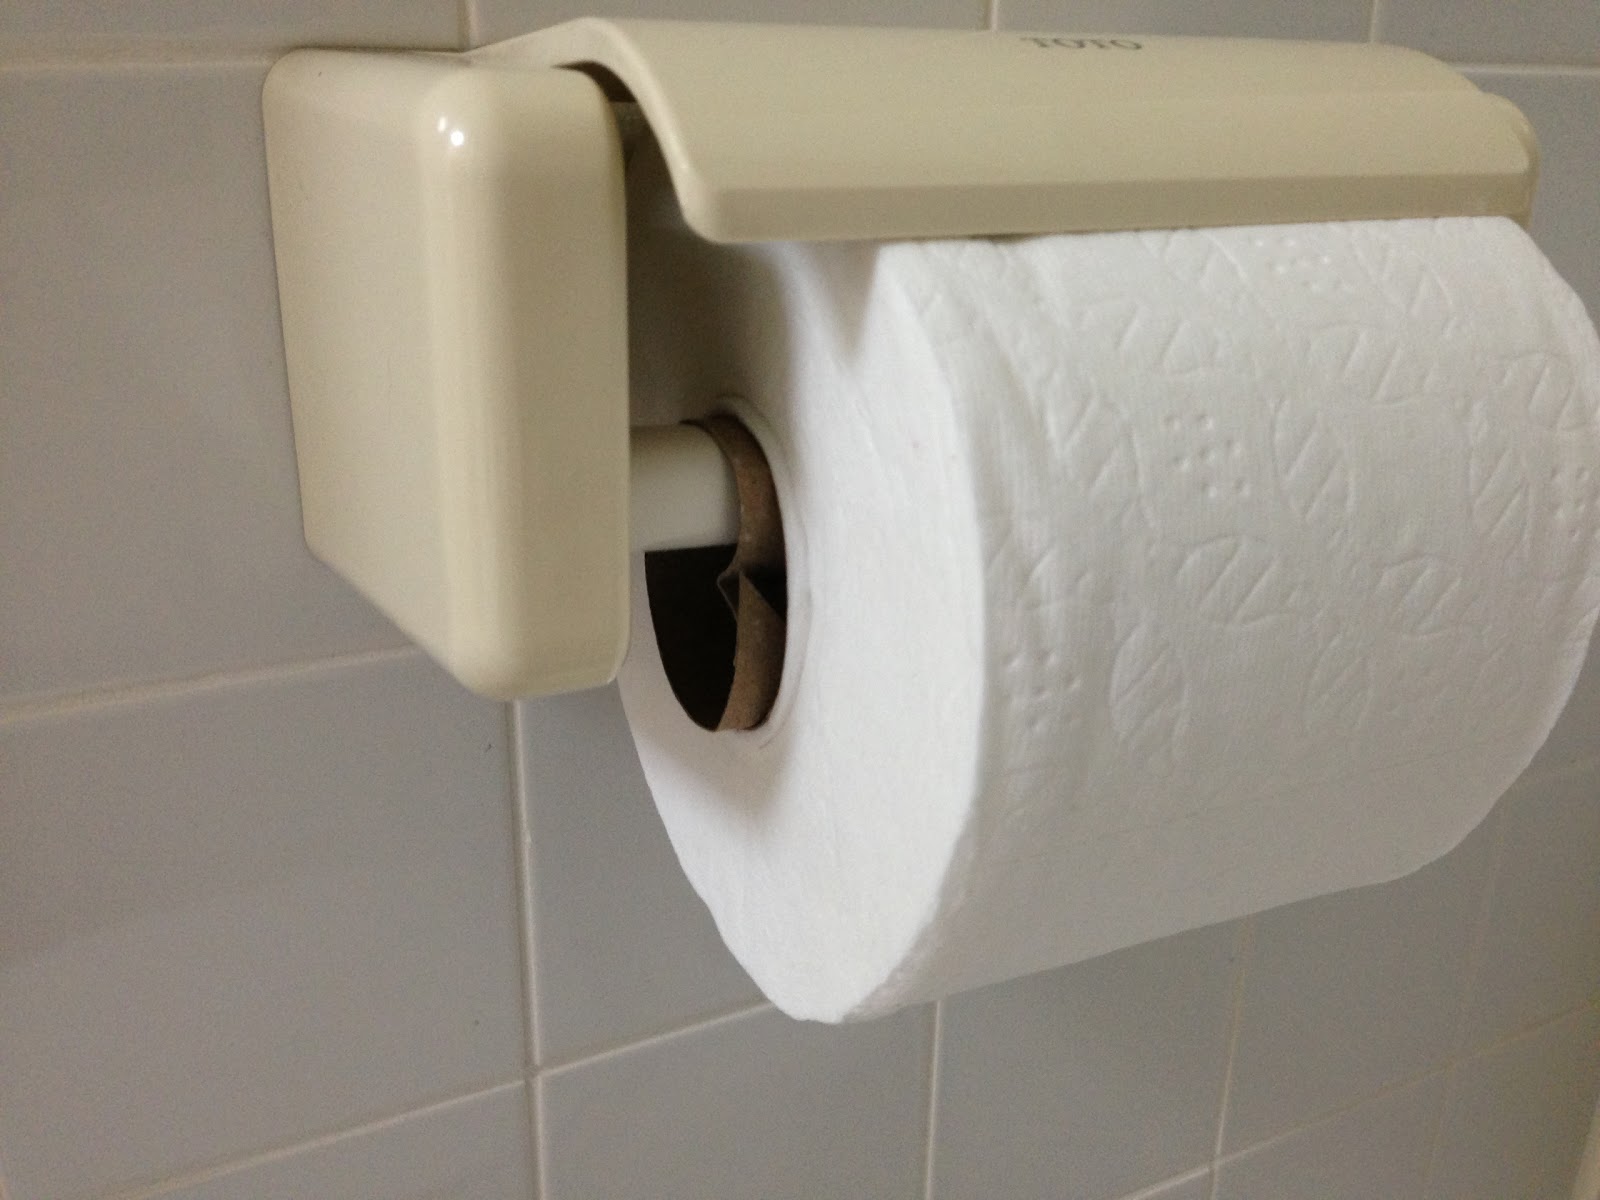
Last night when I switched out a roll in the bathroom I noticed that it didn't fit in the holder anymore.  I compared it to a roll from the previous package that was stowed on an upper shelf and, low and behold, they were different sizes.  I really wish I noticed sooner and saved the old packaging.  I might go back and see if there are any older ones at the back of the shelf; I'm not sure if they practice product rotation on paper goods.


The grocery shrink ray is constantly at work, making products smaller through the guise of a "new look!" then charging the same, or more.  I accept this.  However, we live in overseas military housing and cannot change our built-in bathroom tissue holder that does not accept shorter rolls.


The little pegs at the end flip up and then rest inside the cardboard tube.  The upper flap lowers to keep just enough pressure on the roll to allow an easy tear of the sheet.  It's a great little unit, however it is a bit strange that the Japanese (who are incredibly practical and clever in design) didn't allow for a shrinking product.


As a quick remedy I shoved the old, empty cardboard tube inside the new one.  I may cut a paper towel tube as a better short-term fix but I will certainly be keeping my eyes open for a more sturdy core made of plastic that will last a bit longer.


Darn it, Charmin.  Why did you have to go and mess with a great thing?  We have a very small selection of bathroom tissue over here and, though I am grateful to find Charmin-in-the-red, I am very disappointed in the product shrinkage.

Sunday, November 17, 2013

DIY: Elastic Cuff Links.

Over the years I've discovered that my arms are slightly longer than the average person for my body type.  That or I like my sleeves to fit longer than average for my size.  Two sides of the same coin, I guess.  Nonetheless, when I find a jacket that fits well in the torso the sleeves are too short, and conversely, when the sleeves are correct the body is too loose.

One way to circumvent this is to wear 3/4 length sleeves either by design or, more often, by rolling them up a bit.  I have a few denim jackets that I love with too-short sleeves but folding the cuffs is a problem.  Folding the cuffs up while buttoned makes them too tight on my forearm and cuffing while unbuttoned leaves them loose and falling open.

At first I safety-pinned the ends but found that the pins would pop open, bend, or damage the fabric.  I needed something like a stretchy cuff link and after trying a few types of elastic and rubber bands with various methods I finally found a suitable solution, a hair elastic.  I have a handful of these pony tail holders (the term we used growing-up) from when I had longer hair and now use them all over the house for all sorts of purposes.  They are a fantastic little creation.

Last week when I grabbed my incredibly versatile, white, Levi's denim jacket from the closet I realized the sleeves weren't rolled up and the little elastics I used were not in the buttoned pocket where I like to keep them after washing it.  So I used the opportunity to document the simple process.

First, I cut an average sized hair elastic in two equal pieces and knotted them at the ends creating two loops about an inch long.


Next, I looped it through the button hole and pulled one end through itself.  Apparently this is called a lark's head knot.


Then I pulled that same end and stretched it over the button.  Easy peasy.


Lastly, two folds up of the cuff and it's ready to wear.


I used a brown elastic here because that is what I had laying around.  Someday I'll buy a package of colors or neutral tones but it's not a priority.  The other jackets I've done this with are darker and it's less noticeable, but it's hidden quite well on the back of the forearm.

There you have it, a quick and easy fix for problematic jacket cuff rolls.


2013.11.14.
[Canon EF 50mm f1.4 USM]

Sunday, October 20, 2013

Sidecar of Substitutions.

When limitations bind you it is creativity that allows you to overcome.

After learning about Demerara sugar syrup and reading the Pouring Ribbons’ Sidecar recipe in the New York Times I was determined to make it myself so I set out to find the ingredients.  This is where the “limitations” part comes in.  Finding specialty food items is challenging where we are in Japan, close to Tokyo but not close enough to have metropolitan conveniences.

First, the Demerara sugar syrup.  According to Wikipiedia, Demerara sugar is simply a “natural” form of brown sugar, like turbinado.  Surprisingly, the local commissary had Sugar in the Raw, which is turbinado, so I bought that along with some light brown sugar to add a bit more lovely, molasses richness.  I made a batch of the syrup with one cup of water, 1 ½ cups of turbinado sugar, and ½ cup of brown sugar melted together over low heat.  It is a delicious, dark, simple syrup and will keep in the refrigerator for quite a while in an air-tight bottle.

Next, acquiring the alcohols.  Since I know nothing about Cognac and our immediate selection is incredibly limited, I simply bought a tiny bottle of Hennessy, which happens to have two ounces.  I knew CuraƧao would be a long shot and forget about orange bitters.  There is a large liquor store about twenty minutes away but I have precious little experience driving here (right-side driver on left-side roads) and was not going to test my skills on a rainy, Sunday afternoon.  I was a bit bummed because I was also looking for rye whisky, sweet Vermouth, and sherry, not today’s priority though.

So what follows is my variation of the original recipe with substitutions, even though I vow to make it according to the original recipe eventually.  (This is for one drink, but I split it in two to share with my husband.)


Sidecar of Substitutions:

Orange slice, for garnish
Granulated sugar, for rim
2 ounces Cognac
3/4 ounce Cointreau
3/4 ounce fresh lemon juice
1 dash Campari
½ teaspoon dark simple syrup

1. Rub orange slice around half the outer rim of a coupe glass. Place sugar in a small dish. Holding glass parallel to dish, coat with sugar only the half you’ve rubbed with the orange. Set aside.

2. Combine simple syrup, cognac, Cointreau, lemon juice and Campari in a cocktail shaker. Add ice, then cover, shake and strain into the sugared glass. Garnish with an orange and enjoy.


(This photo was taken with an iPhone and is by no means intended to be a "real" photo, just a snapshot of where I was and what I saw.)