Showing posts with label food. Show all posts

Tuesday, August 12, 2014

Ginger: Simple Syrup.

Simple syrup is sugar and water, in equal parts, heated until the sugar granules are melted. Simple. It is the ideal sweetener for cold foods, especially beverages.

White sugar is default in simple syrup, though you can use brown sugars, raw sugar, and any other sweetened granule you desire. Experiment.

In a previous posting I shared information on making ginger vodka through infusion and mentioned that the ginger can be reused for other purposes. A recent experiment of mine led to a delicious ginger simple syrup using the ginger from a vodka infusion a couple weeks ago.

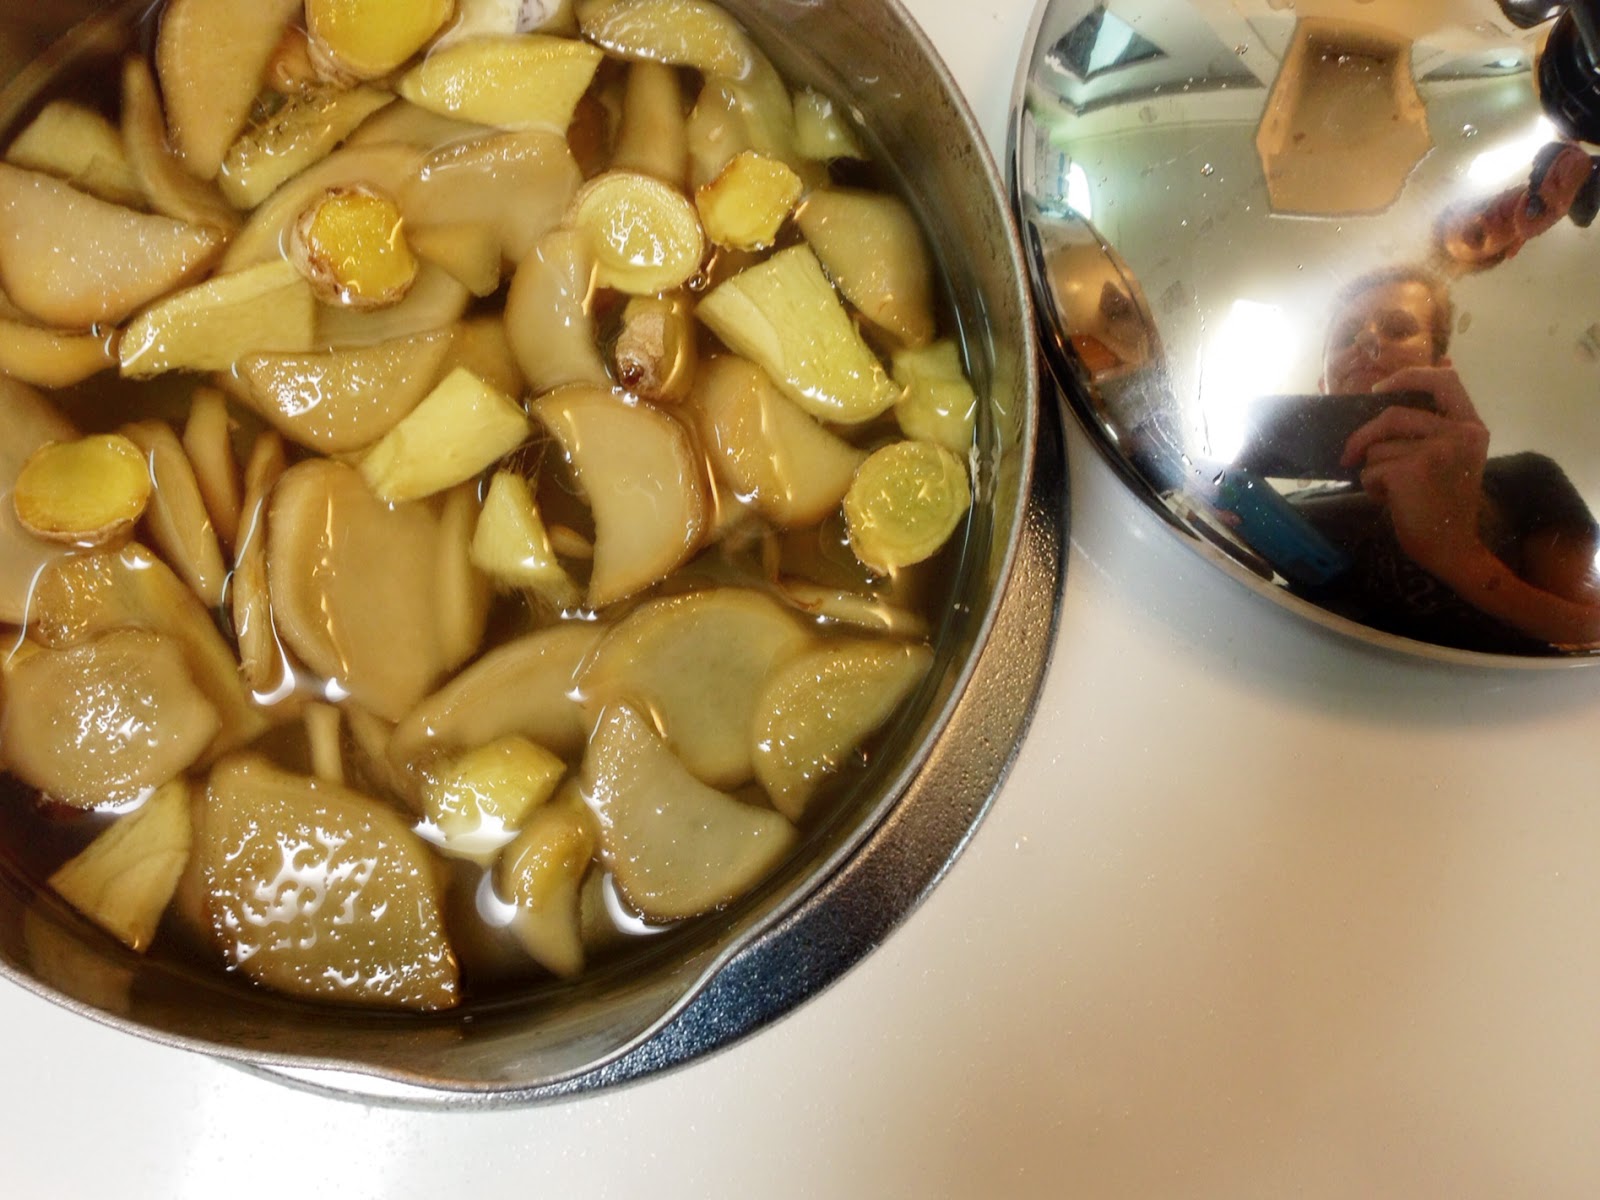
I had about a cup and half of leftover vodka ginger slices and about 1 inch of fresh ginger root that I peeled, sliced and added to that. In a small sauce pan I combined the ginger, 1 ½ cups of water, and 1 ½ cups of white sugar. On high heat I brought it just to a boil then immediately reduced the heat to simmer for about 5-10 minutes.


While giving it a gentle stir periodically I smelled and tasted until it reached my desired gingery-ness. I can't describe it exactly but you should know it when you taste it – a combination of “Yum!” and “Bam!”  Once you hit that point remove the pot from the heat and let it cool enough to where you can pour it through a strainer and funnel it into a bottle or jar. I prefer glass to keep the taste as pure as possible.


Ginger syrup in green sun tea - yum!


Simple syrup should be stored in the refrigerator and will keep as-is for a week, maybe two. However, an easy trick will preserve it for much longer: simply add a small splash of plain vodka to the mixture. I add about 2 teaspoons to a 10-14 ounce bottle. I just eye-ball it; add enough that it mixes thoroughly but not enough to make it alcoholic.  You don't need much and you cannot taste it unless you've added too much. Using this trick most of my simple syrups last almost indefinitely, or at least until they are gone.


Saturday, June 28, 2014

Reverse Grilled Cheese, Toasted.

On this rainy, Saturday afternoon I was looking for something different, yet easy, to make for lunch.  A two-inch slice of ciabatta bread remained from a ham and lentil stew earlier in the week, perfect for some sort of sandwich.  Without a panini press (no need for another single-use, small appliance) I decided to make something that felt like a panini but wasn't.


Toasted Reverse Grilled Cheese

Ciabatta bread, sliced horizontally
Olive Oil
Red onion, sliced thin
Tomato, sliced thick
2 pieces of cheese (Swiss and provolone)
3 pieces of lunch meat (ham)
Honey mustard spread*

Heat a fry pan to medium and drizzle a little olive oil to lightly cover the pan's surface.  When the oil shimmers add onions and swirl around the pan to coat with oil.  Then move the onions toward the outer edges of the pan and place the bread slices in the center, cut side down.  Remove the onions when they are done to your liking, and remove the bread when it is sufficiently crispy.  Then put the lunch meat in the pan to heat, it will cook fast so pay attention, then remove once it's hot.

To assemble the sandwich, add the cooked onions to the top slice, then the cheese.  On the bottom bread slice, spread a thin layer of honey mustard, fold the lunch meat down, and lay the tomatoes on top.  Put the top and bottom together and carefully put in a toaster oven, on a piece of aluminum foil to catch any cheese drips, for about 5 minutes or until the cheese is melted.

*Homemade Honey Mustard:
Dijon mustard, yellow mustard, mayonnaise, and honey mixed together.  Use stone ground mustard and add black pepper for a kickier version, or add some dried herbs (thyme, dill, oregano) for a more savory version.  Great on any type of sandwich and can also be used as a dip.  Keeps in the refrigerator practically indefinitely (you'll use it long before it goes bad).

Sunday, June 22, 2014

Thyme for Ham, Mushrooms, and Macaroni & Cheese.

Every home cook constantly concocts various add-in combinations for boxed macaroni and cheese.  The options are endless, thankfully, because when it’s after 5 pm and dinner plans are nonexistent you need a shortcut.

Today’s rain ended with a beautiful sunset and a chill in the air, perfect for comfort food.  Included in “comfort food” is wine, of course.  A bottle of simple Pinot Noir sat unopened and lonely in my cupboard so I decided to invite Annie and her Shells and WhiteCheddar boxed macaroni and cheese.  To make it a party I also gathered maitake mushrooms, cooked ham, swiss cheese, and fresh thyme; all are very friendly with Pinot Noir.


Mushrooms in Japan are delicious and very affordable; I always have a variety on hand.  I selected the maitake this evening, instead of the shiitake I also have, because they only had a few usable days left.  The ham is leftover from a six-pound, bone-in pork butt I baked recently specifically for the leftovers which are so incredibly delicious and versatile.  The swiss cheese is self-explanatory, I always have sliced cheese, if I ever don’t I might as well be dead.  Thyme is one of my very favorite herbs and I am so happy that my little plant is producing a fantastic harvest of tiny thyme leaves!  Every time I step out on to my front porch and snip some sprigs off I want to run joyously up and down the sidewalk proclaiming my love for fresh thyme. 

I could stop here because if you can make boxed macaroni and cheese you can probably figure out the rest but I will add my “recipe” and cooking method because this is my blog and I choose to.


Thyme for Ham, Mushrooms, and Macaroni & Cheese

1 box of white cheddar macaroni and cheese
1 cup mushrooms, chopped
1 cup cooked ham, chopped or cubed
2 slices of swiss cheese, torn into smaller pieces
1 tsp. fresh thyme leaves (give or take to taste)
1-2 tbsp. butter
1 tbsp. half-and-half (or milk)

1. Begin to boil water for the macaroni noodles; while the water heats and the noodles cook you will prepare the rest of the ingredients.
2. Melt butter in a skillet on medium heat; add mushrooms and sauté until soft, 5 minutes or so.  Remove mushrooms and all the buttery liquid into a small bowl, set aside.
3. Lower heat for skillet as low as it will go, add the ham and cover the pan.  The ham is already cooked and just needs to be warmed but must retain its moisture.
4. Drain the noodles when they are cooked.  While they are draining pour the reserved buttery mushroom liquid into the warm sauce pan (on low heat) and swirl it around; then add the cooked noodles and stir them so they are covered in the butter. 
5. Add the powdered cheese packet; stir.  Pour about 1 tbsp. of half-and-half into the packet, swish it around to capture the hidden cheese powder and add it to the pot; stir until the powder is dissolved.
6. Add the swiss cheese pieces; stir.  Add the ham; stir.  Add the mushrooms; stir.  Add the thyme; stir.  When all the ingredients look combined it is done.


Don’t forget about the Pinot Noir.  Hopefully you opened the bottle while you were cooking and tasted the various ingredients alone and in combination with each other between sips, paying attention to how the flavors played with each other.  Really, that is the best practice of learning how to match and complement wine with food.  And it’s fun.


P.S.  Remember to check the damaged food section of your grocery store, that is where I found this macaroni and cheese for 79¢ a box.  There was a tiny bend with no perforation or tear and a sell-by date far in the future.  Score!

Wednesday, March 5, 2014

To the Produce Stand.

Returning home from a long vacation usually involves greeting an empty refrigerator. Instead of immediately rushing to the grocery store to randomly select whatever looks good I am finally attempting to form a meal plan. So far I’m still in the thinking and researching stage. Until pen hits paper, though, we need to eat.

My pantry is well stocked with canned food and dry goods and the freezer contains meats and leftover meals so there is no need to rush, except for the produce. My Tuesday focus was fresh produce.

Empty fruit and vegetable drawers are a sad sight, so I pulled them out for some loving cleaning and figured I might as well wipe out the inside of the fridge while I’m at it. Then I stepped out into the beautiful, sunny, fifty degree day for my favorite errand, walking to the local produce market.

I’m not sure the name of this particular produce market, but it’s tiny, with an open storefront, and all the prices are written in marker on pieces of cardboard. The prices are good, the quality is great, and, as is customary in Japan, the customer service is warm and friendly. There is usually one person near the front packaging and stocking, one person near the back manning the cash register, and a couple others are in the back room (from what I can tell).

Not having a plan at the produce stand is perfectly acceptable, as long as you keep your purchases to one bag so you have time to use everything while still fresh. I generally choose various items that are easy to use along with one unfamiliar vegetable.

When my arms are full the woman near the back helps me to the register. Even though I can’t yet speak more than the basic handful of frequently used Japanese words, she smiles and talks to me as if I understand everything, which I like because she is treating me as she would every other customer. I’m still working on Fukuro kekko des which I was told means “No bag thank you” because I usually carry my own.  This time I had my awesome, new Whole Foods bag that my sister lovingly gave me; it is big and sturdy and shows a dinosaur loving up on a giant beet.

After paying for my produce with ample arigatou gozaimasu (thank you) I walked up a couple stores to the Family Mart, a konbini (convenience store). Whenever I go out locally I like to stop at more than one place just for the interaction and the experience and I sometimes combine that with a small snack purchase of something new and unfamiliar.

Curious about what I came home with?


Broccoli/Burokori – I tossed the florets in olive oil, roasted them in the oven, then sprinkled sel gris French sea salt on them and ate almost all of them while standing at the stove finishing the main course.  Yum!

Carrots/Ninjin – One of these is cut up the slow cooker right now.

Ginger/Shoga – This is the package at center bottom with the panda face. It is not a dry root but two knots that are moist; the taste is the same because I used it to fancy-up leftover beef guydon last night.

Potatoes/Jagaimo – Just simple white potatoes.

Apples/Ringo – Local apples are delicious, which comes at a price, ¥398 for 5 apples ($3.90 with today’s exchange rate) but so worth it. These particular apples are crisp and juicy without a single flaw or blemish.

Mushrooms/Kinoko – I love mushrooms and frequently buy these three types (from top to bottom of photo): Bunashimeji, Maitake, Shiitake.

Garlic Chives/Nira – This was my mystery vegetable. (Well, a mystery to me). I assumed correctly it was a type of green onion but the flat leaves threw me off. With the help of Google Images I learned about it and used it last night in the guydon, this morning with eggs, and tonight in an experiment.

All that produce came to ¥1458 ($14.28), a deal here because the price of produce certainly gave me sticker shock right after we moved, it still does actually. Notice that nothing was over ¥180 except the apples.


Now, what treats did I find at the Family Mart? 


Gokuri Ume – I knew ume is “plum” so it had to be good, and it was. The bottle reads 1% of something, I assume juice (?) because I didn't see kanji for “alcohol”.  Fruity- and soda-like alcoholic beverages are popular here and are sometimes difficult to distinguish. Gokuri seems to be a line of juice drinks produced by Suntory, a leading beverage company in Japan. It cost ¥158.

Sweet Potato-something – This was 100% sweet deliciousness with a smooth, slightly chewy outer layer and silky-cream sweet potato interior.  I highly recommend it even though it seems rather small for the ¥115 price.

This small excursion took a little under an hour in time and just under two miles in distance. I am so happy and thankful that such a short journey provides so much fulfillment. 


Thursday, December 26, 2013

Merry Eggnog.

My Christmas enthusiasm diminishes a little each year; my love of eggnog however, does not.  In the States I seek out locally-made eggnog because it is generally better than the mass-produced, bland eggnog distributed at great distances, including overseas to military commissaries.  I am thankful it is available here at all, as many other people probably are too, but I do not settle for Darigold eggnog.

Around Thanksgiving I began researching eggnog recipes, looking for traditional and unique flavors.  I found three.


The first batch of eggnog I made was from a New York Times recipe, Nog: The Hard Way, and I followed it exactly with delicious success.  The consistency was smooth and satiny, not too heavy, and the sweetness and the dark rum hit you at once.  My husband selected Coruba Jamaican Rum that happens to harbor incredible brown sugar qualities that marry so well with the creamy nog.  I did not find fault anywhere with this recipe, it is an excellent, classic eggnog.

Calder Dairy, whose farm is located between Detroit and Toledo, has a storefront in Lincoln Park, a downriver suburb of Detroit.  If you are familiar with the area then you may know about their eggnog and may love it as so many people do.  A few years have passed since tasting it last so I forget its unique nuances, my husband remembers better.  Therefore the second recipe I made was one claiming to be theirs.

Calder Dairy’s eggnog differs in its preparation from other traditional recipes because it includes gelatin instead of egg whites to gain the thick, velvety texture.  I assume this is due to packaging, distribution and freshness retention.  It also only includes enough rum to flavor, not enough to sufficiently booze it up for a party.  Even though our Oster blender’s glass container proved a bit small for the job, I easily followed the directions.  Well, I thought I followed directions.

After chilling in the refrigerator overnight I removed the eggnog for finishing.  When I tried to stir it, however, the wire whisk merely bounced off the top.  It solidified entirely.  I must have added two tablespoons of gelatin instead of two teaspoons.  Determined, wooden spoon in hand, I continued with the recipe hoping the vanilla and rum would add some moisture.


I knew drinkable eggnog was out of the question but why should eggnog live solely in one category?  I stirred and stirred and stirred until it resembled tapioca pudding.  I laughed when scooping some into a small dish, finding the situation hilarious, and then brought it to my husband to taste.  He was really looking forward to eggnog as he remembered it so he didn't find it nearly as funny as I did.  But he approved, the sweetness and the flavor were very similar.  I plan on making it again, but probably halving the recipe and paying closer attention to the gelatin.

Butterscotch Scotch Eggnog.  Got your attention, right?  Another NYTimes recipe, this certainly looked like unique eggnog.  I prepared the first half of the recipe the evening before Christmas but the amount of eggnog in my fridge concerned me so I delayed finishing it.  A Christmas dinner invitation spurred completion of the recipe, which I followed very closely.  The only change was using 1 cup of Brandy and ½ cup of Scotch because there was not enough Scotch left.  I used a Japanese grape brandy, Dompierre by Nikka, and Balvenie Doublewood 12-year Scotch.


The recipe specifically states to use an electric mixer (which I did) and when to beat and when to whip.  Following these instructions led to lots of foam that didn't quickly dissipate, though the feedback from others was definitely positive on flavor.  This evening when I pulled the bowl of eggnog from the refrigerator the foam had floated to the top and seemed to have gone down just a bit, so I gently stirred it together.  It is still very foamy but delicious and drinkable, the Brandy and Scotch add a woody-quality that is divine.  Next time I make this I will use the regular beaters instead of the whisk.

After making the different eggnog recipes I learned that eggnog is not difficult to make.  Sure, just opening a carton is easier but for true nog joy you should really consider making it yourself.

Sunday, November 17, 2013

Mint as Savory.

You know when you have the ultimate cable television package with a thousand channels yet there is still nothing good to watch?  It seems the more choices you have the higher your expectations which ultimately leads to disappointment because there has to be something better.

Hunting for wine since moving to Japan has been challenging, only because while living in the States I had plenty of access to ample selection.  I was always looking for something better and, in the process, skipped over many suitable options.

Now when I peruse the ten linear feet of wine shelving at our local shop I am frequently forced inclined to grab a bottle never considered previously, loosening many prejudices to sip with an open mind.

A few weeks ago I found a sparkling wine that looked good, a Chardonnay/Pinot Noir blend, at a moderate price, so I picked up a bottle.  I chilled it and brought it to friend's house for her birthday.  Turns out it was surprisingly good, not knock-your-socks-off wow, but impressive.

The next time I was near the shop where I found it (a train stop and a jaunt away) I picked up two more bottles so I could try it in a non-celebratory manner, which can alter the experience and hence the enjoyment of the wine.  And really, why should sparkling wine be confined solely to celebrations?  Live a little.  Later at home I flipped through a couple books and dug around online until I found a recipe to complement the wine, Parmesan-Herb Lamb Chops with Mint Aioli.

My experience with mint has generally hovered in the sweet arena, namely the Mint Mojito, a refreshingly delectable refreshment.  Detaching mint from sweetness seemed strange though I know it is culinarily common so I went with it.

I didn't easily find lamb chops (surprise surprise) so I picked up a package of bone-in pork chops which I use regularly because they are so versatile.  I did, however, find fresh mint at the neighborhood store (surprise surprise) and bought it despite the $4 price tag (more than the cost of the four pork chops).

The recipe is very straightforward and easy to follow.  When I tasted the prepared mint aioli I was pleasantly surprised with how well the mint married with the fresh garlic and the sel gris french sea salt.  While the oven was heating I threw in some olive-oiled potatoes to roast while I breaded the chops.

I am not including a photo of the finished pork chops because it was wasn't pretty.  The panko breading that should have crusted up while baking did not and ended up mushy, even after turning the broiler on for a bit; next time I will pan fry them as I usually do.  Before the chops became too dry I pulled them out and declared them done.

After topping off my flute with more sparkling wine I sat down to test the meal.  While not a home-run I enjoyed tasting mint as a savory herb, a new experience now urging me to learn more.  The mint seems to fall into the cilantro-basil family which moves my creative gears toward combinations or substitutions among them (strawberry-mint salsa, cilantro martini, basil ice cream).  This is why I am writing about the wine and the recipe, not because the dish was a huge success but because new doors are opening leaving me curious about what lies beyond.  Mint as savory, why did I never try?


Wednesday, October 9, 2013

Creamy Seafood Linguine.

Success two nights in a row.  I’m just going to brag, so close the tab if you don’t want to hear it.


Two packages of seafood and some mushrooms from yesterday’s shopping trip remained in the fridge ready to be delicious.  Since a Spanish Chardonnay was there keeping them company I decided to keep them together because they complement each other splendidly.  Therefore I Googled “shrimp mushrooms butter” and dug into the results, selecting three recipes to work from, saving them in Evernote.


12 medium shrimp at 500Y equals about 43 cents each.


What is Evernote?  It’s an amazing tool.  Briefly I will explain the two reasons I use it, though its applications are much more vast.  First, I began using it to catalog the hopelessly large number of internet bookmarks I have on my computers.  Since it is an outside application that stores my information in a cloud I can access everything from any device that connects to the internet.  My second reason resulted from the first, actually.  I use my laptop for general research purposes and save webpages in Evernote, which I can then access through my cell phone.  This is incredibly convenient when I am at the grocery store looking for a recipe’s ingredients as well as in the kitchen while I’m cooking.  To conserve memory space I frequently save websites in “clearly” (condensed) format which only displays the minimal, pertinent information.  I mention this tonight because it affected how I cooked dinner.

Since Enterprise: The Best Kitty Ever had a routine vet appointment this afternoon, I drove my husband to work so I could use the car.  This meant that I had to pick him up from work in the evening and wouldn't get home to cook dinner until 6pm or later.  The sun now sets here around 5:15pm so 6pm feels very late and dinner preparation is rushed a bit.  I knew what I was making, had the ingredients on hand, and planned about a half hour to prepare it.  Once we got home I jumped right into it, heating up the pan and pealing the shrimp.  When I had the shrimp sautéing in butter I opened the recipe on Evernote and realized the “clearly” version only listed the steps and not the ingredient list.  No problem.

Shrimp and Mushroom Linguine with Creamy Cheese Herb Sauce” is the recipe I worked from.  If you click the link and look at the directions you’ll see exactly what I had to work with.  Obviously I improvised and I’ll attempt to briefly explain my differences.


You figure out the math.


I sautéed the cod fillet and the pealed, raw shrimp in butter with a sprinkling of salt and pepper.  Once done, I removed them from the pan into a covered glass dish, added more butter, and sautéed the maitake mushrooms.  They were quickly done and I added them to the same dish, covered to keep warm.  With more butter (yes!) I threw in three large garlic cloves, coarsely minced, along with the cream cheese.  I stirred it with confusion as it didn't mix very creamy as I assumed it would, but I added a healthy amount of fresh basil (that was in my fridge, a moment away from going bad) and continued stirring.


Maitake mushrooms = Yum.


At this point, I had just added linguine noodles to boiling water and scooped out some of the starchy water to mix with the cream sauce.  Without the ingredient list I had no idea how much to add so I went incrementally, whisking it together.  Once it looked like an appropriate amount of sauce I stopped adding water and stirred in a little corn starch slurry to thicken it up, then I stirred in the cooked seafood and mushrooms.

That’s it.  I drained the linguine noodles for my husband and I scooped mine over fresh baby spinach, with a small amount of noodles to see how they blended with the sauce.  The shrimp were incredibly, meaty and tender at the same time, convincing me that fresh, raw shrimp is the way to go.  I also loved the cod’s texture; I have made it before with similar results and will definitely seek it out regularly, trying new cooking methods.

The Spanish Chardonnay was lighter than the small selection of California Chardonnays I've grown accustomed to since moving here and worked very well with the light cream sauce and simply prepared seafood.  I especially liked it with the spinach because the wine’s lightness resembled that of a Sauvignon Blanc which generally pair well with greens.

I declare success.


Tuesday, October 8, 2013

The Sauce is the Star.

Sesame Crusted Yellowtail: Starring Ginger and Shiitake Mushrooms.

I love the adventure of shopping at local Japanese grocery stores and the resulting creativity it sparks for cooking.  After each successful trip I kick myself for not taking photos and documenting it, promising I’ll do it next time.  But when I walk into a store there is always so much visual stimulation with new and interesting items that require focus and time for investigation, as well as so many people!

No matter which store I go to, neighborhood or city, or what time of day I go there is always a stream of shoppers wandering through the narrow aisles.  I always feel large and intruding and in the way even though I never use a cart, always opting to carry a basket.  I always look carefully at where I’m walking, allowing others to go ahead of head me, communicating with head nods (like a tiny bow, the Japanese equivalent of a wave), lots of friendly smiles, and the occasional “sumimasen” (excuse me) or “gomenna sai” (I’m sorry).

Usually I stick to the outer edge of the grocery store which, like US stores, begins with produce and generally follows into seafood, meats, prepared foods, and other fresh items.  Not only is this path the healthiest but it also contains more easily identifiable foods.  Once you get into the middle aisles the guessing game’s challenge increases dramatically.

The prices here are higher and the portions are smaller, I've mentioned this before, and it’s something I have become mostly accustomed with.  I still get confused in the produce section because most items are priced per piece instead of by weight; I keep forgetting to research the kanji for this in order to read the signs better.  So I simply look for low prices and really delicious and/or interesting items, only sometimes working from a loosely formed list.  Sometimes.

Today I wanted fish and produce.  It had been about two weeks since I went to a Japanese grocery store because I ran out of grocery money before the end of the month.  These two food categories are underwhelming at the commissary and I always try to buy them locally, the quality and prices are much better on the local economy.  I came back with two kinds of fish, two kinds of shrimp, various produce and a small, round loaf of what seems to be a chewy, very good, country bread.

I had no plans for dinner, no list, and no idea what some of my purchases were exactly so I turned to the internet.  One package of fish I bought, containing two small fillets was Yellowtail/Japanese amberjack/Hamachi.  I did not take a photo but it looked just like this.  I also bought three different types of mushrooms because the prices were good, Maitake, Shiitake, and Shimeji.  The Savory Japan website is fantastic for information on basic Japanese foods.

Okay, on to the real subject for this evening, the incredible dinner.

Through some searching I decided on the Sesame Crusted Yellowtail because I had every ingredient on hand.  Once I began gathering them together though I realized that one of the small fillets would never be enough for the husband, so I also used one of the small packages of shrimp which was an extra 20% off (for being close-dated I assume).

I pretty much followed the recipe exactly so I won’t cut and paste it here, just follow the link.  The only changes I made were to include the shrimp, which I prepared just as the fish, and I added a diced Roma tomato that was a moment away from going bad.  Following a reviewer’s suggestion I doubled the sauce, thank goodness, because it was incredible!

My creative moment of the evening was with the ginger.  Fresh ginger is not always available here or I’m just going to the wrong places on the wrong days.  Fortunately I infuse my own ginger vodka.  How does that help?  Well, alcohol acts a preservative so I save the slices of ginger after I've poured the vodka out and save them for cooking.  They are already peeled and much easier to cut once the alcohol has softened the fibrous root.  I am heavy-handed with this preserved ginger as I am not sure how much flavor leaches out while infusing so I used closer to 4 tablespoons or a quarter cup of it minced, and the taste was uncompromised.  Yum yum.

In summation, the fish was delicious, the shrimp was delicious, and the sauce was delectable.  I made wide noodles for the husband and I had mine over baby spinach, as usual.  I really wish I had better photos but when you make it and love it you’ll understand why it disappears before even thinking about a real photo.


While I researched the kitty napped.


(These photos were taken with an iPhone and are by no means intended to be "real" photos, just snapshots of where I was and what I saw.)

Wednesday, October 2, 2013

My (Mostly) Organized Pantry.

The kitchen cabinet saga continues.  Since my last update the kitchen organization has ebbed and flowed, which is how most kitchens evolve I imagine, with items coming and going throughout the day, every day.

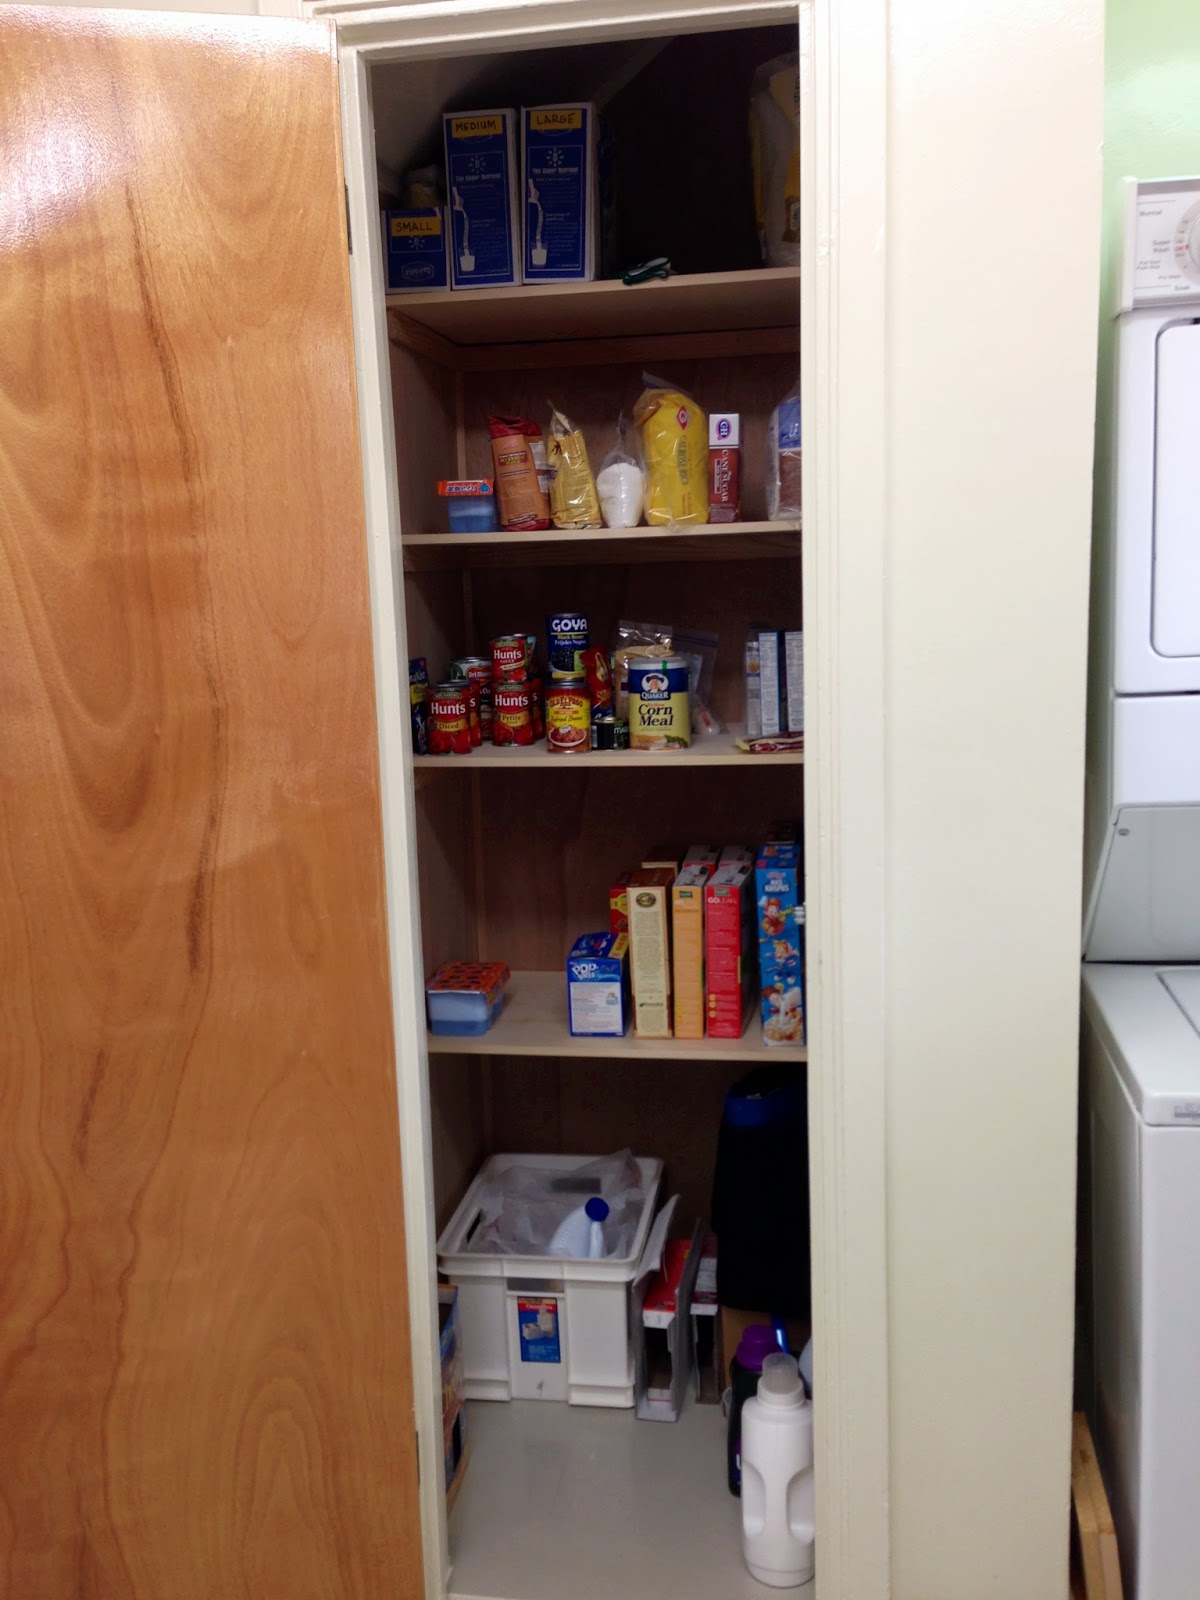
The pantry is in decent shape, I don’t think I shared a photo.  First let’s reminisce about the earlier “before” and “before-after” then I shall reveal the current “after”.  The “before”-s were soon after we moved in with only minimal food on-hand, but it set the foundation for the advanced organization.  Beginning with the top shelf we have: storage and plastic bags to reuse, dry goods, canned goods, cereals, and recycling and laundry detergents at floor level.


"before"


Bonus: After searching a number of local stores I finally found a bright, battery-powered light that my husband installed in one minute with one little screw in the wall.  Now we don't need to turn on a large light to see inside.  This photo was taken while items were still being shifted around.  (No, I didn't paint the trim green, its a bad cell phone photo).


"before-after"


The current “after” follows in a similar fashion.


"after"


Top shelf:  Plastic bags to reuse, organized by size in the sturdy cardboard boxes that we buy our milk in, I use them all over the house (you’ll see).  The back of the shelf holds less used items and the original boxes for a couple small, kitchen appliances including my beloved espresso machine.  In the front are excess items we purchase in larger quantity, such as cat food and rice.

Second shelf: Pastas, rice, grains, and dry beans.  I've been slowly acquiring plastic Snap-Ware containers for opened dry goods.  Japan is made up of islands at the edge of an ocean and therefore is very humid.  Add some heat and the possibility of mildew, mold, and insects increase.  One of my sisters has been using the same Snap-Ware containers for years and likes them very much.  They are air-tight, very stackable, and lightweight, which is important when you relocate frequently with a weight allowance.  The under-shelf, wire bins are from IKEA, about $3.00 each.  You’ll also see many white, wire shelves and organizers around our house, they are versatile beyond belief; I purchased most at thrift stores in the States for a dollar or two.

Third shelf: Canned goods.  This is a challenging category.  I love playing Tetris and have a pocket Game Boy dedicated to it; this shelf requires the same skills of stacking and rearranging to create the best use of space.  They are roughly grouped and organized: various tomatoes, beans, ethnic, vegetables, soups, fruits, meat/seafood, cat food.  On the right is more wire shelving; on the left is a different kind of metal shelving.  It’s the common, chrome, wire shelving used commercially composed of various legs and shelves you can assemble to suit your needs.  Daiso, a ¥100 store, carries small versions of them.  The legs and shelf supports are ¥100 each but the shelves themselves are ¥300 each, making the unit I assembled about ¥800, or $8.00.  They are more expensive than the plastic-coated wire shelves but are much more sturdy and can handle the weight of the cans better.  You can see an example on Amazon here.

Fourth/Bottom shelf: Dry baking goods and cereals.  This is self-explanatory.  You’ll see more Snap-Ware.  With the deep shelves we are able to keep the open cereal boxes in the front and the unopened behind.  The roll of toilet paper is used for Kleenex.

Floor: Bigger, heavier items and laundry supplies.  This area is still a bit messy because I’m still figuring out how to use it efficiently.  On the right you’ll see our laundry supplies which must be kept there because the washer/dryer is directly next to the pantry and has no storage space of its own.  The blue metal shelves are actually locker shelves (like this) I got on clearance for about $2.00 each – score!  At a foot high, they are an awkward height to use in most places but are perfect for storing the large jugs in this tall space.  There is another one directly behind it that fits perfectly over a box containing a large water jug and some MRE’s for an emergency food supply.  On the left you’ll see kitty litter, cat food, paper towels, and other miscellaneous items.  The cereal box is where we put out mixed paper recycling; it isn't picked up curbside so I drop it off at the recycling area when I’m out walking somewhere.

The finished pantry is not picture-perfect or magazine-worthy – the shelving doesn't match, everything isn't lined up symmetrically in baskets with pretty jars and cute labels, and there’s an open roll of toilet paper, for goodness’ sake – but it’s a real, working area that changes and conforms to current needs.  And it’s mine, so put things back where you found them.

If you’re still reading, thank you.  I can’t imagine my pantry is very exciting and I applaud your dedication.  “Now what is that thing hanging off the door handle?”  Since you asked, it’s a door stop.  Well, my creative version of a door stop.  We actually have screen doors at both the front and back of the house.  I love them and like having them both open to encourage the lovely cross-breeze they create.  However, the wind can blow the entry doors closed and, since Enterprise: The Best Kitty Ever is frequently there enjoying the view, it is very unsafe.  Using the bungee on the door handles is the most secure idea I came up with and it was free.


(These photos were taken with an iPhone and are by no means intended to be "real" photos, just snapshots of where I was and what I saw.)

Sunday, September 22, 2013

Clothing and Canned Goods, Update.

First phase of clothing organization: Complete.

Immediately following my last blog post I got to straight to work.  I cleared out the area adjacent to my side of the bed and spent a couple hours cleaning and arranging the various shelving components.  It was more difficult than usual due to space constraints and I realize it may need adjustment as the unpacking continues.  I actually factored earthquake safety into the process and made sure the shelves were stacked firmly together at a moderate height.   Because of this there were a few shelves I didn't use in the setup and haven’t decided yet whether I’ll use them in the bedroom for clothes, in my office downstairs in the dining room, or share them with my husband for use in his office.  I guess it depends on how the unpacking organization unfolds.


The stacks of clothing in the after photo are separated between sleeveless, short sleeve, and long sleeve tops with each category further divided by either solid/printed or warm/cool/neutral colors.  There are separate stacks for built-in bra camis, knit sweaters, and jersey knit turtlenecks.  The bottoms are separated by shorts, capris, and long pants with each category further divided by either leg width (ex: bootcut, skinny), fabric weight, or frequency worn.  This is by no means the extent of my wardrobe; the whole shebang is worth its own post.

While cleaning and reorganizing my old dresser I found one drawer’s slide guide had broken off underneath.  This came as no surprise; the dresser is old and has certainly seen better days.  I think I once wrote about refinishing or updating it, along with the matching desk (that I didn't bring to Japan with me).  All I ever did was replace the knobs and, as you can see from the photo, they didn't fare so well during the move.  I often just want to dissemble the thing for firewood but, for the first time, we don’t even have a fireplace to burn it in.  I guess I’ll make it work somehow.  I asked my husband to fix the slide only because I didn't feel like messing with it.


The next phase of my clothing organization is my shoes, my hanging clothes, and my closet.  This will get done within the week.  It must, I can’t put it off any longer.  I’ll be sure to take some before and after photos because it is a very challenging project.


Middle portion of kitchen organization: Complete.

Within two days of our household goods arriving I had every kitchen box unpacked.  Since we had already been living in the house for over a month I kind of already knew how the kitchen organization would work.  Kind of.  It’s impossible to know precisely how to organize a space until you are living in it, day-to-day, with all your tools and belongings.  So, this weekend, I reorganized a few areas to better suit how I am using it.

This organize-as-you-go method is new to me.  As a perfectionist I like to do things correctly the first time so as not to waste time re-doing it later.  Sometimes this process, however, would freeze me in my tracks if I didn’t know exactly how to proceed.  This time I forced myself to loosen up and realize that it is okay to put things away in a temporary home until a better place was found.  So far, this method is working because I am actually following through on the “better place” part.  For most people this is nothing significant, but it is a true testament to the efficacy of combination drug and talk therapy for those living with any anxiety/depressive disorder.  Small victories, I say.

I re-worked the pantry almost to the point of completion; there are a few minor changes I’d like to do but that will always be the case.  The other most difficult areas are the upper, corner cabinets and the lower, corner, lazy-susan cabinets.  I hate them both.  The lazy-susan cabinets have plastic shelves that cannot bear too much weight and the doors have hinges that are time bombs waiting to break.  I hate them enough that I won’t even continue writing about them now.  I have some before and almost-after photos but I’ll share them later when the almost-after becomes a more actual-after.


Friday, August 30, 2013

Meals and Outfits.

You learned how to dress yourself, you can learn how to cook.

----------

While researching bookmark organization methods, specifically for my laptop's countless recipe bookmarks, I read one woman's technique that I mentally filed away because, although it was logical, it didn't meet my needs of an ingredient-based system.  She organized her recipes by cooking method.

Since reading her cooking method-based approach it's been simmering on my back burner, if you will, especially while I'm reviewing a recipe in front of the stove realizing that I've made a similar dish with different ingredients.

Usually when I Google for recipe ideas it stems from a flavor I'm craving or curious about, or from various perishable foods in my kitchen that I must use soon.  A few recipes might come close with ingredients or technique but rarely do I find one that I follow step by step.  Now, after eight years of ruling the kitchen cooking meals regularly, I can (for the most part) comfortably make it up as I go along, with wildly varying degrees of success.  More often than not, though, I am working loosely from a couple found recipes.

As I touched on in my last post, I've struggled a little bit lately on coming up with dinner ideas.  Just as I like to mix and match clothing pieces to make new outfits, I also like to mix it up in the kitchen to avoid a weekly rut of predictable meals.  This clothing analogy (I love analogies!) runs parallel to my pondering on cooking methods.

Putting an outfit together is similar to assembling a meal – there are various components you combine until you are satisfied with the outcome.  Clothing combinations can be categorized as easily as tops, bottoms, and shoes; or you can be more specific with a short-sleeved top, long pants, and sneakers.  You can get as specific as you want but it's pretty easy to see the general categories.  Sometimes you assemble an outfit based on a color, the weather, or an event.  I linked this thought with how I search for recipes, by flavor, season, or necessity.  I've often compared flavor combinations with color combinations and this simply broadens that idea.

Recently while cooking I've been trying to find my cooking method categories, such as pasta with sauce or protein fillet with pan reduction, which has piqued my interest in learning more techniques.  I've enjoyed clothing as a creative outlet for as long as I can remember (literally!) and using that same creativity through food seems like a natural extension.

This is as far in the process as I've come at this point.  Hopefully I've strung my thoughts together well enough to convey the idea and my excitement about it.  I'm not sure how deep how I want to delve but with internet access and a library I have plenty of resources at no cost.  Just as you wear clothing out of necessity, you eat out of necessity as well; There is no reason not to have fun while doing so.


(By the way, the boneless chicken breast with skin that I bought at a local grocery store the other day worked out to $1.17 a pound!  I hope I did the math right, 533 grams for ¥202.)

Tuesday, August 27, 2013

Messy Bucket of Food for Thought.

My Grandma always says that your mind is like a bucket – it only holds so much.  So when you pour in new information something's going to spill out the other side.

----------

About four months ago we began sorting and packing for our overseas move.  These preparations changed our daily routine which, of course, changed the way we ate.  Now life has settled a bit, we are living in our new house, albeit with precious few of our belongings, and I'm waiting for things to get back to normal.  Ha-ha, the joke is on me.  Our new normal has yet to resemble any normal we've experienced before and I'm doubting whether it ever will.

Instead of delving into the mass confusion swarming my mind currently, at this time I will only speak about daily meals.  Breakfast doesn't count because we still eat cold cereal.  Lunch doesn't count either (even though I just read a great article in the Times this morning about it) because I'm not working and, as I've mentioned before, I'll write about that when I'm ready.  That leaves dinner.

I don't remember specifically what I used to make for dinner before we moved here,  hence the bucket reference.  I have a thousand recipes bookmarked on this computer yet when it comes to figuring out what to make for dinner I'm stumped.

Our current meal foundation is generally protein, vegetable and starch (if it's just me I usually forgo the starch, the husband needs it for PT energy though).  Between the commissary and local grocers most meats and vegetables are available here, however the selection is much more dependent on growing season and the prices are significantly higher.  Meat and fish are packaged in much smaller portions than in the US which is convenient when buying for only two people but the cost is nearly double.

I'm still learning how to use the same food budget in a completely different economy.  The dollar/yen exchange rate is fairly easy to understand but when I'm trying to compare dollar-per-pound to yen-per-gram the math gets confusing.  Produce here is often priced per piece rather than per pound/gram, but since the pricing signs are in kanji it's difficult to figure out.  I once saw potatoes for 28.  I thought it was by weight but it was actually per piece, so those delicious mashed potatoes were quite pricey (by US standards) as it turns out.

Meal planning is non-existent at this point.  I don't know what I can get, where I can get it, or what it will cost.  I can dig into my thousand recipes but finding the ingredients is a crap shoot.  So lately I've been working off-the-cuff; I find a few flavors to play with, search for some recipes, head to the store, and buy what fits the profile that will fit into my backpack.

Today I was thinking about cherry-balsamic glazed pork chops, an idea originating from the package of three boneless chops I bought on Sunday at the commissary.  Unfortunately, the two local grocery stores I went to did not have cherries, a circumstance I foresaw.  Instead I bought a small package of cherry tomatoes and some eggplant.  How the dinner turned out though is inconsequential to the idea I am attempting to describe, but I can say it was pretty good.

While cooking I was trying to remember the order I have followed in the past when making a reduction sauce; it's not brain surgery but there are certainly techniques that yield better results.  Then it hit me – it's all about technique.

I'm a visual person, so bear with me.  Imagine a giant wrecking ball smashing into a huge building with bricks flying everywhere and mortar remnants and rubble tumbling in all direction.  Well, that's kind of what's happening in my mind right now.  When I sort it all through and make sense of it I'll write it all out.

On a side note, I have a huge knot in my shoulder that has bothered me for many long months and it's really aggravating me today, not helping my focus either.

My receipt from today and what I think I remember everything is:


190 = half loaf fresh baguette (10% off, or -19,  for being close dated, I assume)
202 = 533 grams of what I believe is chicken breast
99, 99 = small package of  small mushrooms, small package of spinach/leafy greens
129,199 = 4 small eggplants, ~15 tiny cherry tomatoes
2 = I put the card in my basket indicating that I didn't need a bag but I think she charged me for the one she gave me to put the chicken in.

The produce is by memory so some of it is likely incorrect.  I promise I will take photos of everything I buy during one of these grocery trips.  Anyway, it cost me approximately $9.21 cents for a bit of produce, two chicken breasts and half a baguette.  Maybe I'm a cheap-o but that seems like a lot to me, especially given the package sizes.

Monday, August 12, 2013

Miscellaneous Monday and Pantry Planning.

What is 37°C?  It's time to plan a day indoors.

Actually, it's 98.6°F.  Still time to plan a day indoors, especially with humidity levels causing a heat index in excess of 100°F.  When looking at today's forecast last night I knew any outdoor activity would lead to dripping sweat regret, so I stacked up household chores and got a good night's sleep.

A couple weeks ago I accidentally deleted my favorite playlist and subsequently spent a couple hours putting an updated version back together.  Today, while working around the house I rocked out to that 75 track mix for the first time and when each song started I thought, “Oh, I love this song!”  Job well done, Marlene.

The most tedious and time consuming chore in this house is sweeping the floors.  We have 1242 sq. ft. of white, vinyl composition tile.  Until moving in here I had no idea how much hair the human body sheds in a week.  Be thankful I don't have a macro lens and my tripod otherwise you, too, would know.

Each Monday I place my awesome iPod dock at the bottom of the stairs and crank it up.  This position, aided by the tile floors, allows the music to carry throughout the entire house.  (I always check the neighbor's parking spot before rocking out).  I keep the small, thin remote in one back pocket and my phone in the other.

iPod dock in my former office.

With a regular broom I sweep the dirt/lint/hair into one corner in each zone: upstairs rooms and hallway, bathroom, stairs and living room, and dining room.  Then I use my vacuum cleaner hose extension to suck it up; no dust pan in existence works well enough to get everything.  I have three known organic pest control traps (spiders) and am very, very careful not to disturb them.

Not to bore you with my tedious chores, including dishes, laundry and making more organizers out of food boxes, I'll just touch on two projects.

The first was a simple 15 minute, cost-free solution to a common problem.  We have temporary dining chairs creating marks on my lovely, white, tile floor.  Instead of buying felt pads or knit footies for them (yes, they are common here) I took a couple yellow flannel cloths from our stack, cut them into sixteen squares, and taped them around the chairs' feet.  Pretty, no.  Practical, you betcha.  Since the tape doesn't touch the wood they will easily remove when the furniture is picked up.  The dining chairs we own already have good felt pads on them but I will definitely check their condition when they arrive and replace if necessary.

Notice the school-tile floor.


The second project is larger – pantry organization.  I have no grand idea for an amazingly beautiful, artfully and sparsely stocked pantry.  I just want to find the best use of space in order to cram everything in but still be able to find things.  Also, the humidity here requires dry good be kept in real airtight containers, not just ziplock bags.

After sifting through many useless websites simply there to sell expensive organizers, I found one that actually laid out an easy to follow, basic plan for pantry organization.  Her ideas are practical and seemingly achievable, and her container suggestions are pretty much visual aids to help you figure out what is best for your needs and your space.

My pantry budget is not up to me so frugality is my plan.  ¥100 stores carry a surprising variety of wire shelving and storage solutions, it won't take many additions to increase the storage of the four-shelf closet.  It's the air-tight containers that require a little more investment, and by “a little more” I mean IKEA not Crate & Barrel.

Using my handy Listomni app, I took stock of all the dry goods I have and the ones I keep on hand, including the common package sizes.  I will perform a little online research for container sizes and prices to give me a better idea and what I'm looking for and how much it may cost.  With our many weight-restricted relocations I must rule out glass and stick to plastic, and I prefer right angles rather than cylinders, both preferences will make the search easier.


This is my at-the-very-beginning "before" shot.  First, and foremost, there is no light inside the pantry.  This will change soon, very soon, maybe even tomorrow soon.  Second, squeezed immediately to the right of the pantry is our efficiency-sized, stackable washer/dryer unit (another post entirely) with virtually no storage space of its own, leaving detergents to live with the food.  We also have no indoor space designated for recyclables; Since I am an avid recycler, this will change too.

"Before."

I did a quick empty, organize, and refill resulting in the following "after-before" shot.  Biggest differences: recyclables went into a white crate, paper recycling was taken out, and plastic shopping bags were organized into re-purposed milk boxes labelled small, medium and large (on the top shelf).  This made it easier to take inventory of dry goods, and to take thorough and accurate measurements.

After "before."

I am hoping to finish in two weeks.  Since my mobility is pedestrian- and public transit-limited, and weather-permitting, I need time.  Only after exhausting all local options will I pester for suggest an IKEA trip to my husband.  And I better have a good list.


(These photos, except the first one, were taken with an iPhone and are by no means intended to be "real" photos, just snapshots of where I was and what I saw.)
Friday, August 2, 2013

Fish with Black Bean Veggies.

Since moving into our house I've been cooking frequently, remembering how much I enjoy it. Quite a few dishes, many involving Mystery Fish (with labels in kanji), have been delicious! I thought I had written about these meals but apparently I have not, a fact I realized when trying to look them up. Oops. So I may share some of them in retrospect, but not tonight. Tonight I write about the present.

As with most meals, I began with a basic Google search using a concept based on ingredients on hand. I typed “fish with quinoa/couscous” this morning because, besides some miscellaneous vegetables, that's what I found in the kitchen. In the fridge were two packs of Mystery Fish I recently purchased. Aeon, a local grocery store, has great prices and I took advantage of their ¥98 per 100 gram fish sale. Well, it was ¥98 a-something and the math equaled about per 100 grams. Don't ask what the math is dollar per pound; if you can figure it out let me know. 


I tabbed four recipes with ingredients I either have or can find/substitute easily, and that will work with most kinds of fish. What I have discovered recently about cooking with recipes is that they really only represent a framework, or an inspiration of flavors, of what I cook. This fact surely is representative of many seasoned home cooks but it's something I've noticed in the past few years that has progressed incrementally. And if it means that I have graduated to “seasoned home cook” than I am proud.

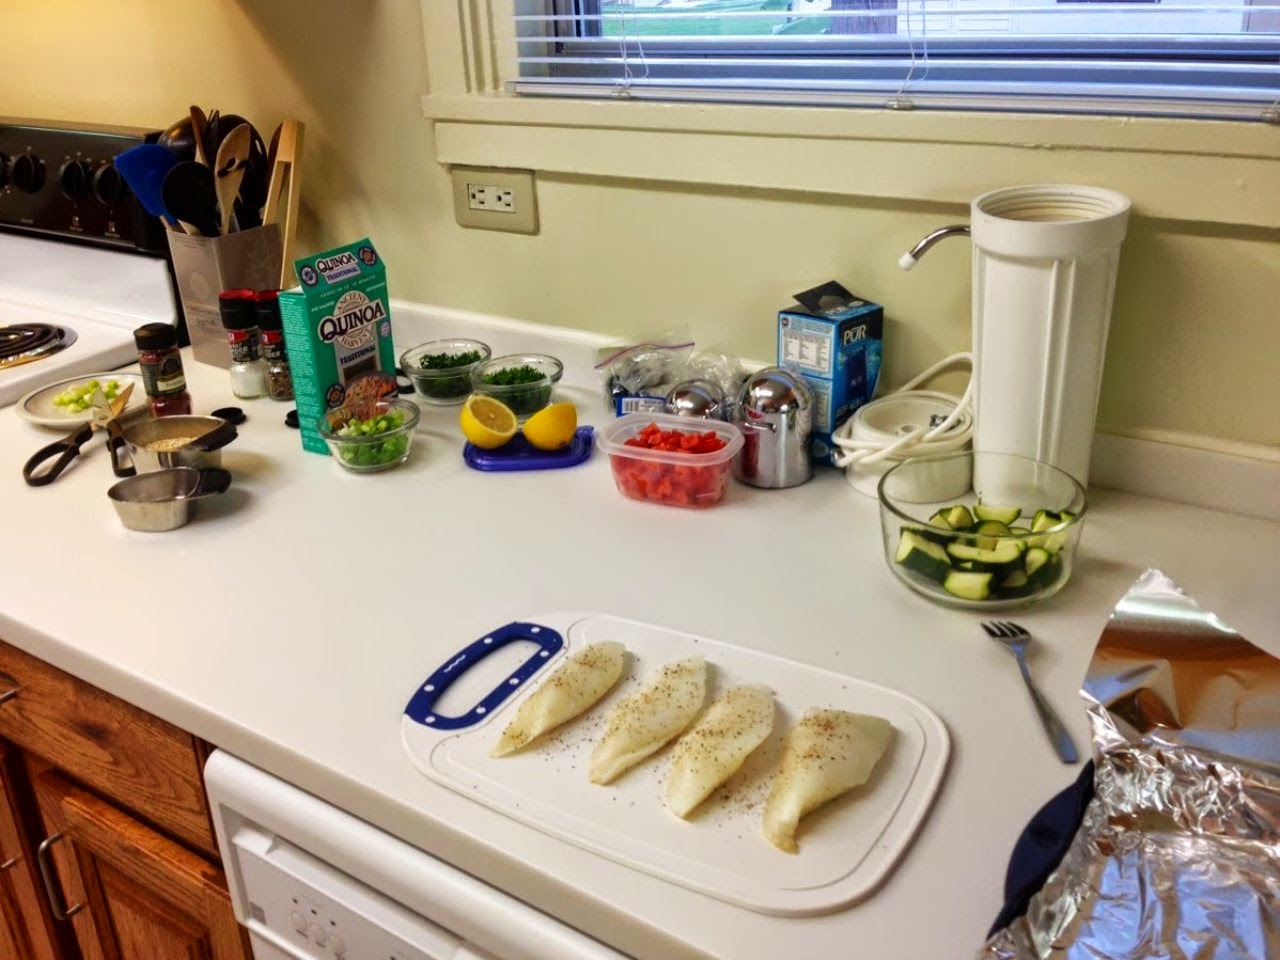
Tilapia with Quinoa & Black Beans is the basis for tonight's dinner. I had everything except the zucchini and green onion, which I could have substituted with some bell pepper ends and my choice of either white, yellow, or red onion, but I needed to get out of the house so I walked the scant half mile to get those along with a can of black beans. Normally I would have a multitude of canned beans in the pantry but I have yet to go on the big restock-the-pantry shopping trip. Hint to the husband.


Of course, I altered the recipe. Speaking of modifying recipes, I have a conundrum. I regularly read comments on recipes from readers and am annoyed when people rate a recipe after they radically changed it's entire essence. Don't get me wrong, I love reading how others played with flavors, but please don't rate a recipe poorly when you substituted almost every ingredient along with the cooking method. Chalk it up to a learning experience and keep your keyboard silent. But also, please continue sharing your methods. See the problem?

I will try to share what I did tonight because the results were worthy of a repeat, not a home run but a solid double with an RBI. I served this over quinoa (for my husband) and fresh spinach (for me) but feel free to use any starch, filler or base you want. Remember, most measurements are estimates.


Fish with Black Bean Veggies

  • 4 fish fillets (about 1 lb. total)
  • ½ can canned black beans (rinsed)
  • 1 cup chopped tomatoes
  • 1 sliced medium zucchini
  • 1/2 cup sliced green onions, divided
  • 1/2 fresh lemon
  • 2 tablespoons olive oil, divided
  • 2 tablespoons butter, divided
  • salt and pepper
(Begin cooking quinoa/grain/starch, if using)

Salt and pepper the fish.

Melt 1 tbsp each of olive oil and butter over med-high heat. When hot, stir in ¼ cup of the green onions then add the fish. Flip fish once then squeeze a bit of the lemon half on top. Remove just about when you think it's done. Keep warm (wrapped in foil or something).

In same pan, melt the other tbsp each of olive and butter and add black beans, tomatoes, zucchini and green onions and stir in spice. (Option: splash in a touch of white wine/vermouth and let reduce. Then add a splash of chicken broth or water and let reduce until desired consistency).

When the vegetable mix is cooked to your liking it's done. Serve over anything you like and top with the fish.

It's that easy.


(These photos were taken with an iPhone and are by no means intended to be "real" photos, just snapshots of where I was and what I saw.) 
 

Sunday, July 21, 2013

Sunday, Chardonnay, and Chicken Thighs.

Like the weather, with a certain unpredictability, my taste for wine shifts like seasonal winds. Lately I've really been enjoying Chardonnay, a wine with which I am particularly picky. After trying so many that tasted like fermented pineapples I gave them up, dismissing them as I had shunned Boone's Farm* so many years ago. Then I began dating my husband-to-be, whose preferred wine is Chardonnay, and I began slowly and apprehensively experimenting again. 
 
During this time I was working as the Coffee Buyer in the Specialty Department at a Whole Foods Market. Included in this department is coffee, tea, high quality chocolate, cheese, beer and wine. Jackpot, I know! The first Chardonnay I successfully enjoyed was from Bonterra, an organic winery, which gave me hope. Occasionally I would try others, simply to keep my wine mind open, but my focus usually fell elsewhere; at the time I preferred heavy reds like Sangiovese and Super Tuscans. 
 
Years (and years) later, while living in Texas, I discovered an oasis in the middle of my blazing, desolate hell – Spec's Fine Spirits and Specialty Store. The first wine specialist I spoke with there taught me the most important wine fact in relation to my taste preference for Chardonnay: warmer climates produce a more tropical flavor (ex: pineapple) and cooler climates produce less tropical. The other major factor is whether it is aged in oak or not. With more experimentation I learned my preference lies in the cool-climate/ light oak category, which helps tremendously when selecting a Chardonnay.

Since moving to Japan I am still discovering where to find an acceptable wine selection. Spec's spoiled me rotten. Label requirements here are different and are usually in kanji so buying wine holds an unknown risk. As in Texas, sweet wine is common and I wouldn't know what to do if I opened an undrinkable bottle after spending 1000Y/$10 or more. The safest place to buy wine locally unfortunately has the least desirable selection. Everything is labeled for the US market, so on the plus side, I know exactly what I am getting; on the negative side, I know exactly what I am getting. The best Chardonnay, to my liking, this shop carries is Kendall-Jackson's Vintner's Reserve Chardonnay. Your reaction will surely vary with your wine consumption. 
 
Why all this talk of Chardonnay, you ask? I wanted some with dinner tonight and hence researched Chardonnay friendly recipes. I found three and made the one whose ingredients I found easily, Wine-Baked Chicken Legs with Marjoram. I made a few adjustments, of course. 


Update: photo of leftover meal, still incredible.

 
Being a thrifty-minded person, I was not going to use 2 cups of a $14.95 bottle of Kendall-Jackson Chardonnay. In fact, I wouldn't even use 2 cups of $8.95 Mirassou Chardonnay. So the 2 cups of dry white wine consisted of 6 oz. Mirassou and 10 oz. of Martini extra dry Vermouth. My husband likes classic martinis but a bottle of Vermouth will not stay fresh for as long as it takes him to finish it. Since it is a drinkable, dry, white wine it is completely acceptable to use in cooking, even more so than any cheap “cooking wine” found in the condiment aisle. 
 
When making a meal designed to pair with wine I usually pour a glass while cooking and periodically taste it during the stages of preparation. Tonight was no different except the that the wines surprised me. I poured a small glass of each Chardonnay and tested them through the recipe steps. On their own, the Mirassou was thin and bit tropically sweet, the Kendall-Jackson a bit more full with an oaky, fruit roundness. But as I tasted them during the onion sauce preparation, the Mirassou lost it's sweetness while balancing the creamy sauce and the Kendall-Jackson seemed to lose it's oaky edge in the same fight. I've frequently read that you should always cook with a wine you would drink and it seems that using the less expensive wine during cooking (even mixed with an even less expensive Vermouth) increased the desirable taste of the wine when being paired with the completed meal. I even performed a blind taste test with my husband (who is familiar with Kendall-Jackson's Chardonnay and was not present during my wine purchase), asking him which of the unlabeled glasses of wine tasted better with the meal and his conclusion was the same as mine – the less expensive wine tasted better. It goes to show, you never know; Keep an open mind.

Nonetheless, tonight's dinner of Wine-Baked Chicken Legs with Marjoram was delicious. I impressed myself enough to judge it worthy of a blog post. Preparation was very easy, the longest span of time was the oven baking. Best of all, this recipe lends itself to endless variations of protein source, herb enhancements and filler (vegetable or starch).

 
This is my version of MarciaKiesel's recipe from Food & Wine Magazine:

Wine-Baked Chicken Legs with Marjoram

1 large shallot, thinly sliced
1 bay leaf
4 chicken thighs
2 cups dry white wine
Salt and freshly ground pepper
1 cup half & half
1 tablespoons marjoram (dried)
2 tablespoons of flour

Preheat the oven to 425°. Spread the shallots and bay leaf in an appropriately sized baking dish or roasting pan. Arrange the chicken in the pan, skin side up, and pour the wine over the legs. Season the chicken with salt and pepper and bake in the upper third of the oven for about 50 minutes, or until the skin is crisp and the chicken is cooked through. 

Reduce the oven temperature to warm.  Temporarily transfer the chicken legs to a heatproof platter.  Discard the bay leaf. Pour the pan juices (with onions) into a small saucepan.  Put the chicken back into the roasting pan, cover loosely with foil, and return to oven to keep warm.

Bring the onion sauce to a boil over high heat until reduced to a thicker consistency (about 2 cups), about 10 minutes. Season the sauce with salt and stir in the marjoram. Add the half & half and very gently boil until reduced a bit more, about 5 minutes. Reduce heat to med-low and add flour, tablespoon at a time, stirring until sauce is thick.

Serve over a bed of fresh spinach leaves or angel hair pasta.


With no photo of the finished product nicely plated, all I have is this photo of the leftovers, not beautiful but it will be just as delicious tomorrow.


These are the wines used in order of price:  Vermouth, Mirassou Chardonnay, Kendall-Jackson Chardonnay.


* Disclaimer: Boone's Farm played a significant role during my college years.