Tuesday, August 12, 2014

Ten on Ten: August.

August 10 fell on a Sunday this year, a day I am usually busy teaching one-on-one conversational English (ESL) with Japanese people keen on learning it.  However, this is the busiest week of Obon travel season and my schedule was very light, giving me time to participate in the project.

I did not set my alarm hourly as a reminder so photo times are not precise.  Also, every photo is from my iPhone which does not perform well in low light.  Next month I am hoping to use my real camera.


10am:
Remains of kitty's brunch.


11am:
End of class.


12pm:
Between typhoon rain storms.


1pm:
Catching up online.


2pm:
Lunchtime.


3pm:
Reading.


4pm:
Dinnertime for kitty.


5pm:
Still reading.  Rainy day.


6pm:
Dinner - Choose your own adventure night.


7pm:
A quiet evening; almost finished.


The Ten on Ten project originally began with Rebekah Gough at her blog, a bit of sunshine.  She explains it as, "a fun and interactive way for blogger's from all around the globe to document a snap shot of their lives too, once a month on the tenth taking a photo an hour for ten consecutive hours. Finding life and beauty in the ordinary things of our day to day!" 

Ginger: Simple Syrup.

Simple syrup is sugar and water, in equal parts, heated until the sugar granules are melted. Simple. It is the ideal sweetener for cold foods, especially beverages.

White sugar is default in simple syrup, though you can use brown sugars, raw sugar, and any other sweetened granule you desire. Experiment.

In a previous posting I shared information on making ginger vodka through infusion and mentioned that the ginger can be reused for other purposes. A recent experiment of mine led to a delicious ginger simple syrup using the ginger from a vodka infusion a couple weeks ago.

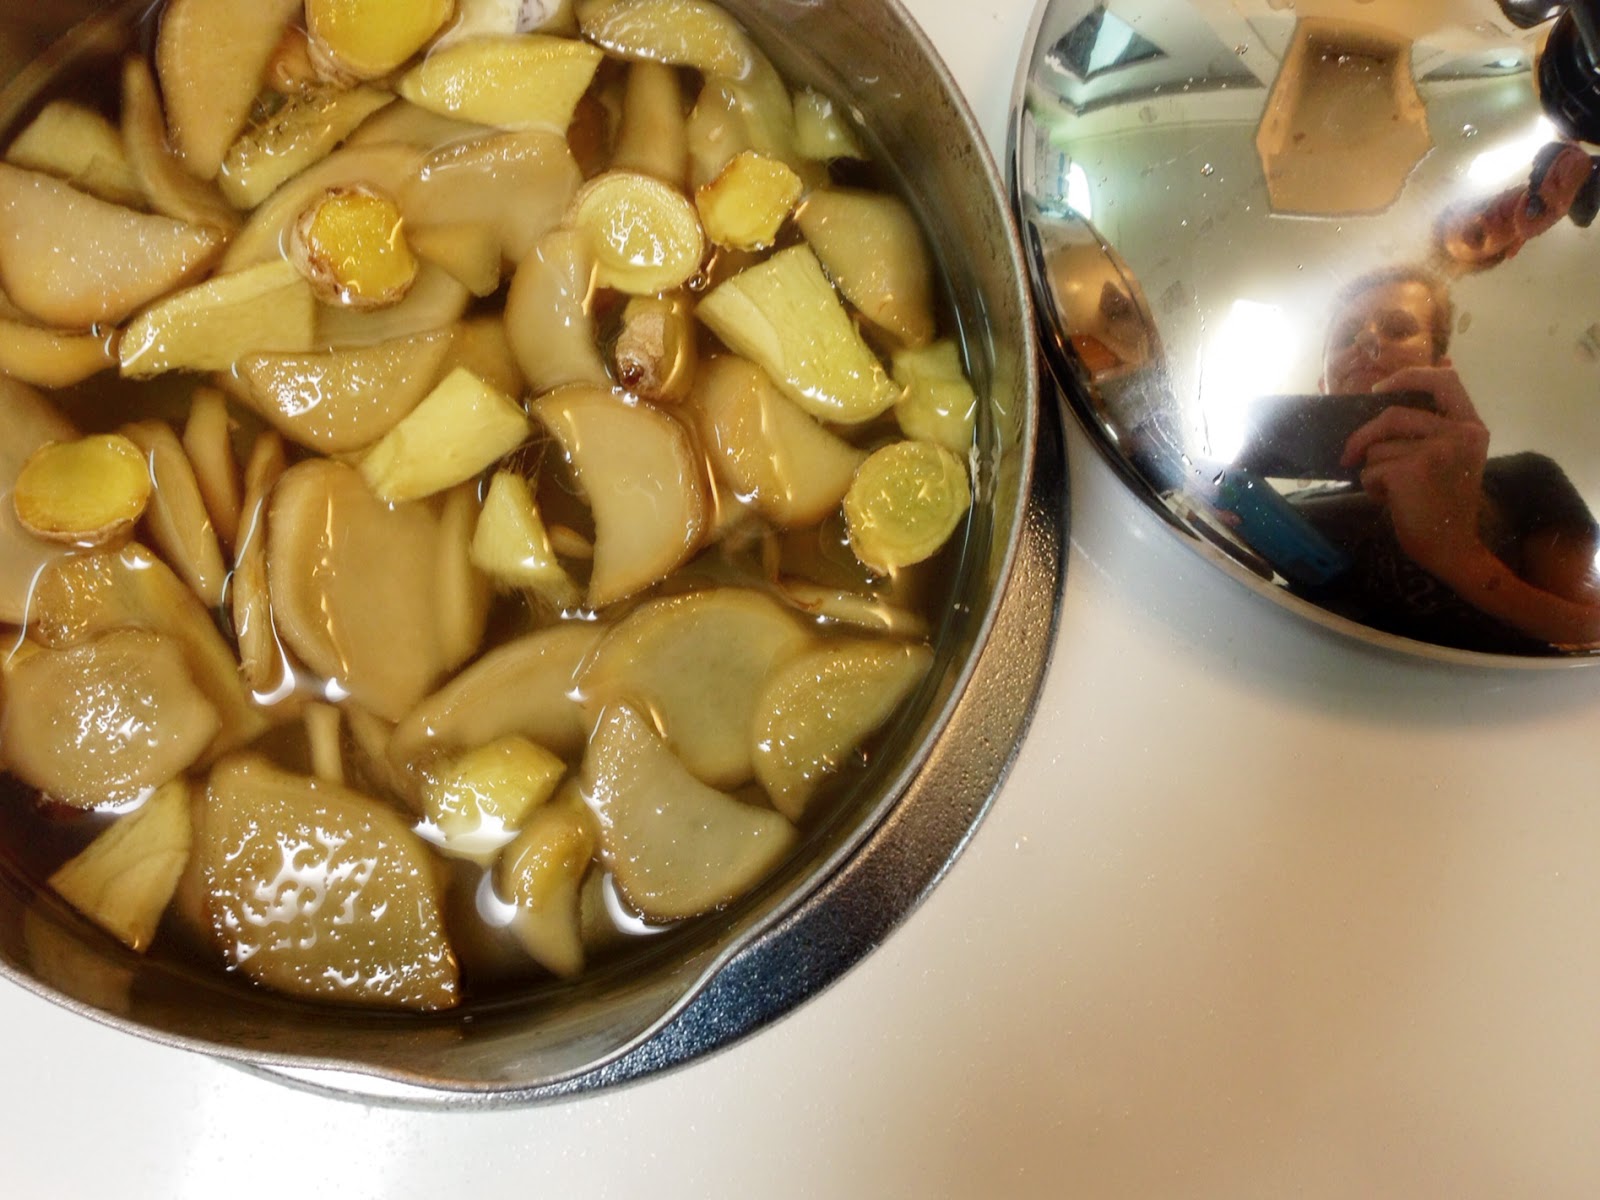
I had about a cup and half of leftover vodka ginger slices and about 1 inch of fresh ginger root that I peeled, sliced and added to that. In a small sauce pan I combined the ginger, 1 ½ cups of water, and 1 ½ cups of white sugar. On high heat I brought it just to a boil then immediately reduced the heat to simmer for about 5-10 minutes.


While giving it a gentle stir periodically I smelled and tasted until it reached my desired gingery-ness. I can't describe it exactly but you should know it when you taste it – a combination of “Yum!” and “Bam!”  Once you hit that point remove the pot from the heat and let it cool enough to where you can pour it through a strainer and funnel it into a bottle or jar. I prefer glass to keep the taste as pure as possible.


Ginger syrup in green sun tea - yum!


Simple syrup should be stored in the refrigerator and will keep as-is for a week, maybe two. However, an easy trick will preserve it for much longer: simply add a small splash of plain vodka to the mixture. I add about 2 teaspoons to a 10-14 ounce bottle. I just eye-ball it; add enough that it mixes thoroughly but not enough to make it alcoholic.  You don't need much and you cannot taste it unless you've added too much. Using this trick most of my simple syrups last almost indefinitely, or at least until they are gone.


Ginger: Gin-Gin Martini.

My earliest memories of ginger include the nose-tingling sensation of Vernor's Ginger Ale and my Mother's dinnertime warning to not eat any ginger slices hidden in the stir-fry.

My love of ginger grows each time I taste it used in a different way. If it's on a menu in any manner I will try it. Four or five years ago I went to a Seattle restaurant with a friend before attending the ballet and with a little hesitancy ordered their Gin-Gin Martini. It has been my favorite cocktail ever since.

I began making it at home using store-bought ginger vodka, first with a Polish rye version, Alchemia Imbirowa, and when I could not find that, Skyy Ginger Vodka. The Alchmia was decent but eventually it became unavailable; Skyy was better than nothing but certainly lacked a true ginger root essence, tasting more of ginger ale syrup than the real thing.

Dissatisfied with the ready-made options I decided to make the ginger vodka myself, not actually distilling it of course, but by simple infusion. It was insanely easy and I could not believe I wasn't making it all along.

Three simple steps to make ginger vodka:
1. Peel and slice a ginger root
2. Soak cut ginger in plain vodka
3. Strain

Three detailed steps to make ginger vodka (using a 1 liter bottle):

1. Find a piece of ginger root with maybe 6 or 7 inches of usable pieces; it is better to infuse too much than too little because you can always dilute it down to your preference. You don't have to remove the outer skin but it makes a more clear final product so I always do; use a peeler or a small knife (very carefully). Slice the root across the grain into discs about 1/8 to ¼ inches thick. This isn't science, you don't have to measure, but you want to take full advantage of all the glorious ginger flavor. Once cut you should have a hefty handful of sliced ginger, maybe 1 ½ to 2 cups.

2. Put the sliced ginger into a pitcher and pour the vodka in. Place the pitcher into a refrigerator for at least 2 days, I've left it in for up to a week. Soaking ginger in alcohol is actually one way of preserving it so I wouldn't worry about the time on the long end.

3. Using a mesh strainer and a funnel pour the infused vodka back into the original bottle. I store the finished product in the refrigerator, it just seems better. If you are infusing less than a bottle it is very convenient to use a coffee press because then you can skip the strainer and funnel and simply pour directly from the pitcher.

4. (Optional, but highly recommended) Save the ginger from your infusion and store it in the refrigerator, I use a glass bowl covered with plastic wrap. As I mentioned earlier, it is actually preserved and can be re-used. Most often I use it in strir-frys but it is certainly not limited to that.


Finally, you now have ginger vodka and can make your own Gin-Gin Martini. Yes, I know it is not technically a martini, but since it contains only spirits I let the term slide on this one.


Gin-Gin Martini

1 oz. Gin (Bombay Sapphire pref.)
1 oz. Ginger vodka (home-infused pref.)
1 slice of cucumber

In a cocktail shaker add ice and spirits. Shake or stir (pref.) until well-chilled, the colder the better. Strain into small cocktail glass. Place cucumber slice on the rim. Enjoy.

Saturday, June 28, 2014

Reverse Grilled Cheese, Toasted.

On this rainy, Saturday afternoon I was looking for something different, yet easy, to make for lunch.  A two-inch slice of ciabatta bread remained from a ham and lentil stew earlier in the week, perfect for some sort of sandwich.  Without a panini press (no need for another single-use, small appliance) I decided to make something that felt like a panini but wasn't.


Toasted Reverse Grilled Cheese

Ciabatta bread, sliced horizontally
Olive Oil
Red onion, sliced thin
Tomato, sliced thick
2 pieces of cheese (Swiss and provolone)
3 pieces of lunch meat (ham)
Honey mustard spread*

Heat a fry pan to medium and drizzle a little olive oil to lightly cover the pan's surface.  When the oil shimmers add onions and swirl around the pan to coat with oil.  Then move the onions toward the outer edges of the pan and place the bread slices in the center, cut side down.  Remove the onions when they are done to your liking, and remove the bread when it is sufficiently crispy.  Then put the lunch meat in the pan to heat, it will cook fast so pay attention, then remove once it's hot.

To assemble the sandwich, add the cooked onions to the top slice, then the cheese.  On the bottom bread slice, spread a thin layer of honey mustard, fold the lunch meat down, and lay the tomatoes on top.  Put the top and bottom together and carefully put in a toaster oven, on a piece of aluminum foil to catch any cheese drips, for about 5 minutes or until the cheese is melted.

*Homemade Honey Mustard:
Dijon mustard, yellow mustard, mayonnaise, and honey mixed together.  Use stone ground mustard and add black pepper for a kickier version, or add some dried herbs (thyme, dill, oregano) for a more savory version.  Great on any type of sandwich and can also be used as a dip.  Keeps in the refrigerator practically indefinitely (you'll use it long before it goes bad).

Sunday, June 22, 2014

Thyme for Ham, Mushrooms, and Macaroni & Cheese.

Every home cook constantly concocts various add-in combinations for boxed macaroni and cheese.  The options are endless, thankfully, because when it’s after 5 pm and dinner plans are nonexistent you need a shortcut.

Today’s rain ended with a beautiful sunset and a chill in the air, perfect for comfort food.  Included in “comfort food” is wine, of course.  A bottle of simple Pinot Noir sat unopened and lonely in my cupboard so I decided to invite Annie and her Shells and WhiteCheddar boxed macaroni and cheese.  To make it a party I also gathered maitake mushrooms, cooked ham, swiss cheese, and fresh thyme; all are very friendly with Pinot Noir.


Mushrooms in Japan are delicious and very affordable; I always have a variety on hand.  I selected the maitake this evening, instead of the shiitake I also have, because they only had a few usable days left.  The ham is leftover from a six-pound, bone-in pork butt I baked recently specifically for the leftovers which are so incredibly delicious and versatile.  The swiss cheese is self-explanatory, I always have sliced cheese, if I ever don’t I might as well be dead.  Thyme is one of my very favorite herbs and I am so happy that my little plant is producing a fantastic harvest of tiny thyme leaves!  Every time I step out on to my front porch and snip some sprigs off I want to run joyously up and down the sidewalk proclaiming my love for fresh thyme. 

I could stop here because if you can make boxed macaroni and cheese you can probably figure out the rest but I will add my “recipe” and cooking method because this is my blog and I choose to.


Thyme for Ham, Mushrooms, and Macaroni & Cheese

1 box of white cheddar macaroni and cheese
1 cup mushrooms, chopped
1 cup cooked ham, chopped or cubed
2 slices of swiss cheese, torn into smaller pieces
1 tsp. fresh thyme leaves (give or take to taste)
1-2 tbsp. butter
1 tbsp. half-and-half (or milk)

1. Begin to boil water for the macaroni noodles; while the water heats and the noodles cook you will prepare the rest of the ingredients.
2. Melt butter in a skillet on medium heat; add mushrooms and sauté until soft, 5 minutes or so.  Remove mushrooms and all the buttery liquid into a small bowl, set aside.
3. Lower heat for skillet as low as it will go, add the ham and cover the pan.  The ham is already cooked and just needs to be warmed but must retain its moisture.
4. Drain the noodles when they are cooked.  While they are draining pour the reserved buttery mushroom liquid into the warm sauce pan (on low heat) and swirl it around; then add the cooked noodles and stir them so they are covered in the butter. 
5. Add the powdered cheese packet; stir.  Pour about 1 tbsp. of half-and-half into the packet, swish it around to capture the hidden cheese powder and add it to the pot; stir until the powder is dissolved.
6. Add the swiss cheese pieces; stir.  Add the ham; stir.  Add the mushrooms; stir.  Add the thyme; stir.  When all the ingredients look combined it is done.


Don’t forget about the Pinot Noir.  Hopefully you opened the bottle while you were cooking and tasted the various ingredients alone and in combination with each other between sips, paying attention to how the flavors played with each other.  Really, that is the best practice of learning how to match and complement wine with food.  And it’s fun.


P.S.  Remember to check the damaged food section of your grocery store, that is where I found this macaroni and cheese for 79¢ a box.  There was a tiny bend with no perforation or tear and a sell-by date far in the future.  Score!

Wednesday, May 21, 2014

Happy Fun Time with Small Ikea Projects.


Even though our closest Ikea is only about 14 miles away it takes an hour to drive there if traffic is moving well.  Our first visit was on a Friday afternoon late last summer shortly after we moved here and it was packed.  When I decided return this past Wednesday I chose to go by myself and arrived just after their 10 am opening, carefully backing in to my parking space.

Previously we had parked front end first as we are used to in the US.  We were the only vehicle there parked like that.  Most drivers in Japan seem to back-in park.  I assume it is due to the population density and the number of people always walking and riding bikes.  It is safer to back in to a parking space where people are unlikely to be than to back out of that space where people are guaranteed to be.  Then when you leave, facing outward, you can easily see anyone moving.  I am grateful for our small car because backing in a right-side drive vehicle takes some a lot of practice after operating as a left-side driver for twenty years.

The number of shoppers this time seemed similar to what I am familiar with in the States so I was able to take my time following the path around the store.  I worked comfortably off my prepared list and found most of what I was looking for.  


Top priority on my list was the Bekvam step stool for our bathroom; I looked for it on our previous trip but it was sold out.  Various hygiene tasks are simpler to perform while sitting, such as clipping your nails.  The toilet lid is generally the default location to sit in a bathroom.  The plastic lid on our industrial/commercial commode, however, is too flexible and bends inward with any weight.  This leaves the bathtub edge to sit on which is not comfortable in the least.

Hence, the step stool.  Not only is it versatile enough for use an almost any room, at ¥1533 (~$15) it was one of the most inexpensive options.  


I chose the natural wood and stained the pieces outside a couple days ago with two coats of the Behandla glazing paint.  I put it together yesterday and am impressed with its solidity, not a creak or wobble at all, and it fits perfectly under the sink.

The shelves pictured here on the left are a future project.  I picked up the set for $5 but one of them must be cured of it's unfortunate white sponge paint.  I am considering whether to paint both or just the one, and what type of paint to use over the laminate surface.

The black Kassett magazine files are new also.  I have other pieces in the series and these were on my list.


Using the same Ikea glaze I stained these two small unfinished cigar boxes I picked up at our local thrift store for 75¢ each.  They had some cutesy decoration things glued on the tops that I gently, but easily, pried off.  Then I sanded off the glue residue.

You can also see here some of the Kassett series boxes bought previously that are no longer available.  I use them for storing medium sized photo prints and albums.


The remaining Ikea items I bought are photo frames.  I carefully measured the sizes I needed and researched the metric equivalent to find the appropriate sizes for my needs.  

We have a window at the top of our stairs with blank walls on either side demanding art.  Because the light is usually dim in this hallway I wanted some large but simple photographs to hang there.  I waited (and waited) until Mpix ran a sale and ordered 20 inch square prints of two macro photos I took this past spring.  The Nyttja frames are 50 cm square, about half an inch off, but since they are upstairs I can alter the framing just a bit and it won't be as noticeable.  We shall see how it works out when the prints arrive.

Monday, May 12, 2014

Ten on Ten: May.

The Ten on Ten Project was first introduced to me through the blog of an awesome person whose life intersected with mine at a pivotal point, Bleu Dress Jes.  The concept originally began with Rebekah Gough at her blog, a bit of sunshine.  She explains it as, "a fun and interactive way for blogger's from all around the globe to document a snap shot of their lives too, once a month on the tenth taking a photo an hour for ten consecutive hours. Finding life and beauty in the ordinary things of our day to day!"

My first month of participation was this past April.  I used Instagram, shared on Facebook, to track my day.  It was a bit much, I admit, and very time consuming to photograph, notate, and post hourly photos in real time.  I approached this 10th of May differently.

First, I completely forgot about the Ten on Ten until I checked the time on my phone when arriving at the train station; it was 8:00 am precisely and the Date read, May 10.  I immediately took two photos.  I was heading out of the train station to meet up with a group of other photo club members who were going up to Tokyo for the day to get their camera sensors cleaned and to photograph the city, of course.  Since my sensor was cleaned recently I went for the experience, I love photowalk meetups.

Remembering to take hourly snapshots throughout the day while also out with a group and taking "real" photographs was challenging.  All of the Ten on Ten shots were taken within about a ten minute time frame around the top of the hour.  Since we were on the move the whole day I didn't take the time to set up or compose an artful shot, instead I snapped a few quick photos and later combined them in little collages made through Moldiv, a collage photo app available through iTunes and Google Play for Android.

Instead of blowing up my Instagram and Facebook feeds I am sharing my May Ten on Ten here, and in the future if I remember.


Odakyu-Sagamihara Train Station.


On the train in suburban Tokyo.


Shinjuku Station.


Harajuku Station.


Meiji Shrine, Tokyo.


Yoyogi Park, Tokyo.


Lunch at Mekan, Harajuku.


Takeshita Street, Harajuku.


Returning to Shinjiku Station.


Transferring from express to local, Sagami-Ono Station.


All photos taken with iPhone 5.